What's new
GrowWeedEasy.com
You're browsing as a guest. Sign up to join the conversation, share your grows, and get help from thousands of fellow growers — it's free and takes less than a minute.

Please, Help with mold issue!

Lord-Xanthor

New member
After fixing issues with heat, PH, light panels, & all other disasters that has happened since I started this project, I was replacing the cheap plant trays with larger more durable ones which allowed me to space my plants out better and when I lifted the heat mats to clean under them, that's where I found mold growing. The mold was basically dried out and I used a damp paper towel with bleach/mold solution and wiped the bottom of the tent before placing everything back. My plants have not shown any mold, then again their just hitting 4 weeks of age now. I use a peroxide solution every day I water my plants. The temperature inside the grow tent is just about always 75 degrees Fahrenheit. I had shut the mats off a week ago but now debating on turning them back on and keeping the temperature a constant 75 degrees. What I would like to know, is if there is some kind of chemical, or non chemical in which I can spray the tent to prevent mold. Its a bit of a chore lifting the mats each time as the plant are getting older and bigger so hoping there is something that I can use to prevent more from showing up. I water my plants daily, but I don't over water them. They each get 8 ounces of water daily which I increase as the plants get bigger. I also just removed all sick and dying leafs. Airflow is constant, using an Airbrush as main air cleaner, then another fan at a slower setting to bring clean air in, and a third fan to circulate the air throughout the tent. Even though the tiny drop of mold was dried out, I'm worried of more showing up. I just sprayed the leafs with a peroxide solution as well to fight off any mold issues.

I think I got it. The article I read kept sending me to a sprayer, but managed to order SM-90 1 Quart. I'm sure two days wont make to much of a difference. It was only under the heating mat, so will spray everything Thursday once it comes.
 
Last edited:
There are many many types of fungi we call 'mold' , and just because you found some in that restricted spot doesn't necessary mean your buds, which are out in the open surrounded by air, are in any danger. In general, most mold/fungi thrives in humid conditions with little airflow. The one thing you haven't mentioned is your RH.
Your chief weapon against mold is to lower RH. Anything below 50 should be fine, and anything below 70
can be lived with. Above 70 can be too it just a takes more work. Raising the temps a little can lower RH. So can a dehumidifier.
Your second invaluable weapon against mold is airflow. Lots of air movement will work wonders, so don't hesitate to put another movement fan in.
Lower RH and more air, and mold cannot live in your grow, period.
I'd work on these two factors and not worry about spraying. Good luck.
 
No Title

There are many many types of fungi we call 'mold' , and just because you found some in that restricted spot doesn't necessary mean your buds, which are out in the open surrounded by air, are in any danger. In general, most mold/fungi thrives in humid conditions with little airflow. The one thing you haven't mentioned is your RH.
Your chief weapon against mold is to lower RH. Anything below 50 should be fine, and anything below 70
can be lived with. Above 70 can be too it just a takes more work. Raising the temps a little can lower RH. So can a dehumidifier.
Your second invaluable weapon against mold is airflow. Lots of air movement will work wonders, so don't hesitate to put another movement fan in.
Lower RH and more air, and mold cannot live in your grow, period.
I'd work on these two factors and not worry about spraying. Good luck.

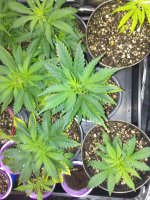
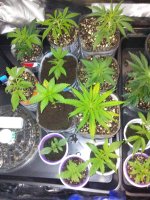
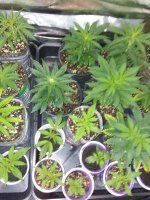
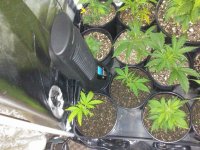
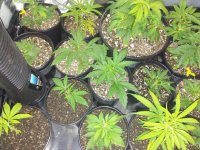
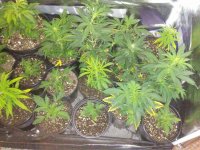
I have 25 plants, hopefully 28 in a few days. I replanted 3 White Widow Max's, the last 3 seeds I had left in hopes these 3 live. Lost $600 in seeds when thermostat cooked half my seedlings a month ago. Anyway, RH is 56%. Most of my plants are in their 4th week. Some their 1st and 2nd. Tomorrow every one of them will be transferred to 1 gallon pots I am getting tomorrow. I was planning on not just spraying the plants, but entire tent walls and floor on Friday with that spray. Posting some pictures. The yellow tipped plants are NUTE Burn. Happened the day after I used a small amount of Bloomz on all my plants. I was going to wait much later to use it, but when I saw my autos with buds, I decided to give it a try. I also removed every sick and dying leafs except the bigger more healthy leafs that were slightly yellow. I will be replanting everything into 1 gallon pots, except GSC, she gets a 3 gallon one. When I started moving the plants earlier to clean under the mats, found quite a few of them where they grew the roots right out of the drainage holes. Going to be interesting on how well I get hose plants out of their old containers while not tearing those roots. The top right picture shows yellow and green leafs on a Neville Haze plant. This plant was hurt worse when thermostat caused it and everything on it to get cooked, then PH issue, then nut burn on top. Everything is stable for now, and new foliage is showing green. Almost forgot, if you see several plants with leafs that look like they were nibbled on, they were. Two days ago, my daughters cat managed to get in through a service duct I failed to close because I never noticed it due to its location. Got her out within 45 seconds, so minimal damage plus she didn't eat enough to be lethal. Had called the vet. Basically the cat didn't ingest any of the plant, just chewed on the leafs which I removed most of them except for a few of the larger more healthy ones.
 

Attachments

  • photo8105.jpg
    photo8105.jpg
    3.3 MB · Views: 1
  • photo8106.jpg
    photo8106.jpg
    3 MB · Views: 3
  • photo8107.jpg
    photo8107.jpg
    2.9 MB · Views: 3
Last edited:
Definitely never hurts to clean up the grow. With 56 RH and good air flow there is zero reason you should be getting gray mold/budrot.
My RH is in the 70s most of the time.
 
Its the places like under the mats that had the few spots of mold. Not to be confused with the hard water over here. Thanks again for the info Weasel
 
Last edited:
When it comes to the topic of mold it is truly something I have spent a lot of time learning a lot of things about and have a lot of years of experience with on a personal level. First of all mold stops growing completely at an RH of 30% and anything lower than 30% allows that mold to become a dry powder which can and will float in the air for great distances. That is why when cleaning mold, the first thing you want to do is to saturate it with a liquid, depending on the surface I'll use bleach, vinegar (white vinegar when it comes to surfaces and AC vinegar when it comes to plants) or a product I buy which can found at big box stores called "Mold Armor" which comes in a spray bottle as well as a house wash and prevents mold as well as kills mold on household surfaces. As it was already pointed out there is a number of different types of molds, and they are constantly around in the air all the time just waiting to find food and water in which to take off and grow. Once you pass around 60-70% RH molds really have all the moisture they need to get going really good, and in a greenhouse type of environment that is the perfect conditions for molds to take off in.

You stated the mold was on a heat mat, which doesn't surprise me because the heat mat would help to condensate any moisture in the air between your pot and the mat making it a perfect spot for the mold to grow, the heat mat then dried out the water which condensed there and thus dried out the mold. If it were me, I'd just wipe everything down with a bleach water or vinegar water wash and dry it with a dry cloth and give the pot a little air circulation underneath it to prevent future issues. I like to keep 1/4 of an inch or a couple of coins under the pots to prevent condensation building up between the pots and the surface they sit on, it also allows any spilled water to evaporate that may not get wiped up.

Another thing which caught my eye was that you water your plants everyday, and yet you do not think you overwater them, which I am sorry to say is wrong because you are over watering them. The soil needs to be soaked with water and then allowed to dry up completely before watering it again. When you water just a little bit every day, what you are doing is you are just getting water to sit in the same places in the soil every time because of the way water flows through the soil, as it will always take the path of least resistance. This leads to wet pockets of soil which in turn become havens for anaerobic bacteria, fungus, algae, etc... to begin to have a great breeding ground for, and you will think you are doing so good and then suddenly one day your plant will droop and you won't know why, and by the time you figure out your soil smells sour or like raw sewage it will be to late to do anything to save the plant. You don't even have to take my word for this, you can look it up on a search to see I'm completely serious on this.

When you say "peroxide" I am assuming here you are meaning "hydrogen peroxide" 3% drug store over the counter strength? I am not sure the strength you are using by the time its mixed with the water, but it shouldn't be more than 10% at maximum and even then I would strongly recommend you go and do a lot more research on how to use H2O2 (hydrogen peroxide) correctly when it comes to using it with your nute water to water the plants. H2O2 is great for cleaning because it eats organic material, and that is why when I did my own research on this I found that some information out there brought up the need to let the H2O2 water sit for a period of time prior to using it, so it is not so damaging to the tender young roots of your plants.

The other thing I wanted to touch on was the temp of your root zone, you may not realize this but the temp of your root zone is very important the same as it is for hydro growers, you want a root zone temp around 68-degrees, once you move past 72-degrees you are making the water hard to hold oxygen and believe it or not roots need oxygen to be healthy and to survive. Once you pass 75-80 degrees water holds no oxygen anymore and that is where you get stagnant water and the smells of sour or sewage from the water or soil. If the plant canopy temps were cooler than you wanted them to be, then you can raise the root zone temps to compensate to prevent stressing the plants. If the plant canopy temps were to be 90+ and you couldn't get the temps down, then someone could even lower the root zone temps to 60-degrees to prevent stressing the plants I've read with great success. The closer you keep your root temps to 65-degrees I do know will greatly increase how much your plants can take up for nutes, even if you oxygenate your root zone even with some 1/4-inch soaker hose and connect it to a fish aquarium pump in a soil grow. No, I am not kidding, I wondered this for years and then a couple years ago I saw the AD in a magazine for this basic concept being marketed by someone and it won all kinds of awards because this idea and concept really does work, will help the plant to uptake even more nutes and grow faster yet.

 
I do a daily watering, mist spray, to keep the soil hydrated but not soaked. I was once thinking of doing that with an air pump, I'm sure that would help in drying up the soil faster too. Thanks Greenthumb. The mats are off btw. I was only using them during the germination period. With the LED lights, fans, charcoal filter, the average temperature is 75 degrees. There is no stagnant smells, and the trays are dry. The only time I water the plants enough to cause water to drain out the bottom is when I'm taking PH level tests to make sure the readings are close to what is going in. As for the air pump. Those air stones, or more like Air "T"'s that they sell for hydroponics systems. You recommend getting those for each plant and hooking it to a fish tank air pump?
 
Last edited:
Greenthumb is right about the watering. Most of the time cannabis doesn't like a steady state of moisture. It does better with a wet/dry cycle. It's slightly less important in flowering. But daily watering is generally a bad idea. Overwatering means- watering too often. Staying wet constantly will cause all kinds of problems.
 
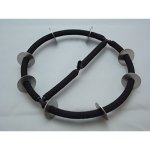
Okay so here is what I know and how much I've learned thus far when it comes to oxygenating the root zone, when it came to soil aeration I used a few of those 1/4 inch air line tee's and I divided the circle at the bottom into 4 sections, and then had two different hoops coming up and connecting to the other side. I then ran two separate air lines down to the soaker hoses all connected together, which for all intents and purposes looked like a ball cut in half and then placed into the pot and covered with soil, with two separate air lines connecting it to an air pump I picked up for $10. The roots of the plant really filled up the pot and became amazingly root bound without having the root bound issues I would have expected.

In hydro I tried something similar by putting a 4-inch air stone on one side of water tub the plant was being grown in and the side with the air stone grew thick and full like a full head of hair, while the other side without the air stone had much less roots and certainly not nearly as big or as many of them. Which lead me to try one on either side of the pots, and then the nute uptake soared. It would only be fair to also point out that I know I see such huge swings like this because I am maxing out all of the other factors.
 
By any chance, do you have a picture of this setup? I saw air stones that were 100 for $15. The bubblers at $20 each average, those are the rings with a "T" in the middle that normally go into hydroponic systems, would be too costly for 26 plants. Was wondering if these three items might work? Posting EBay links:

http://www.ebay.com/itm/231978828878?var=531172350845

http://www.ebay.com/itm/30-pcs-Air-...268570?hash=item3d0f37031a:g:C9QAAOSwGotWnaiC

http://www.ebay.com/itm/10X-Air-Sto...533133?hash=item463963810d:g:0HEAAOSwFnFV-ncq
 
No Title

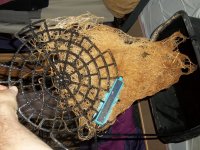
First I skipped putting metal washers on the design because it would cost extra parts and instead of just joining the two sides of the aeration ring across, I went with a longer piece of 1/4 inch soaker hose and created a hoop. Imagine a clock I had two hoops from 12 - 6 and from 3 - 9 O' clock and on the outer ring I connected my two input air lines to my pump.

The 2nd photo is of a set up where I used a plastic "deck protector" ring which is meant to keep a potted plant off the deck of your house you cut to size, I then used a 4-inch air stone from Walmart driven by one side of a 2-port air pump also from Walmart for $10. All of this then sits inside an 18-quart plastic dish washing tub and the fabric Geo Pot then sits on top of the plastic ring down inside the water about 6-8 inches deep, which then has an overflow on the side of the tub back to the res; imagine the overflow of a bathtub for the basic design concept. As you can see the roots only massively grew on the side with the air stone during this experiment. When the two sides of the plant were given air via an air pump and two air stones, each side getting 1.8 GPH of air from the air pump, the roots took off with amazing speeds and have required higher EC-TDS-PPM's for the nutes and grew at faster speeds.

When I used a same type of air stone to aerate the Rapid Rooter Plugs in a growing tray with seeds within a week I saw seedlings 2-3 inches tall have a tap root as long as my forearm when I lifted it up to transplant them, and the tray which wasn't being aerated the roots of the same seedlings started from seed at the same time at best had roots just starting to come out the side of the Rapid Rooter Plug. Further researching you can look up how even grass on a lawn is aerated to improve its roots and health, I found an AD in a popular cannabis magazine for the aeration ring for pots filled with potting soil.
 

Attachments

  • photo8148.jpg
    photo8148.jpg
    149.5 KB · Views: 2
  • photo8150.jpg
    photo8150.jpg
    4.1 MB · Views: 3
Hi Lord

To much written here but I'd like to add what kind of exhaust do you have? You need a fan to suck up the moisture and with all the plants you have they make moisture, so before you get into 12/12 you have to be in control of the environment.

To prevent mold, air circulating in your grow area.
 
No Title

@Karlee
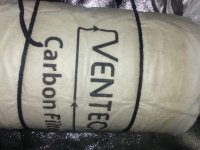
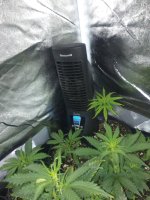
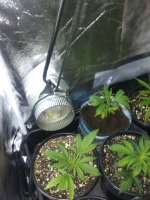
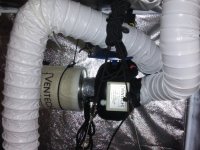
I'm using a Ventech charcoal 4" Duct fan to pull everything out of the tent. I have it set to medium and the only opening for air to come in also has a fan in it to bring air in as well. More air it leaving then coming in, as the sides of the tent get sucked in. I also have a fan in the corner so all my plants are getting circulation from the two lower fans. Pictures as follows:
 

Attachments

  • photo8253.jpg
    photo8253.jpg
    2 MB · Views: 2
  • photo8254.jpg
    photo8254.jpg
    3.2 MB · Views: 3
  • photo8255.jpg
    photo8255.jpg
    3 MB · Views: 0
Last edited:
On your middle photo, the fan is literally in the corner and honestly I think you are hurting your air circulation there. If you read the manual for a fan, dehumidifier, etc... pretty much anything that requires air circulation around it, including a TV you will note they say "keep so many inches-feet away from everything to allow for good air circulation". Point is if your fan is jammed into the corner like that it would be like asking you to run the mile breathing through a straw, because you are starving the fan of the very air you are expecting it to move. Perhaps move it away from the sides of the tent by 6-8 inches and take note of how much more the air circulation improves.

The other point I'd make is to note your intake fan, it appears as if the intake air comes right in and hits the pot sitting right there in front of it and won't properly circulate around like you are hoping it will. If possible try helping to dump the incoming air above the height of the pots so it will circulate better, maybe use one of those adjustable metal elbows to just raise the intake air height up a little, or even use a small piece of flexible duct... either way I think if you made these two changes I think you would see you'd notice a difference in the results inside your tent.
 
Just a followup to my 01-18-2017 comment. I have 25 plants, 28 if the three White Widow Max seeds germinate. I'm beginning to think three strains out of the lot are bad as I was never able to get them to germinate. The few that did break out of the shell died within one day and after checking a seed under an electronic microscope, I believe for the first time, it's nothing to do with what I have been doing. All my seeds came from one source, and over the past month the three strains I checked, the seeds were black inside missing either food or the embryo. I wrote the seller about this, and they have not once responded so I know I am in the right direction. The three strains that failed badly with the same symptoms were: Purple Hulk, White Widow Max, & AK47.
 
First I skipped putting metal washers on the design because it would cost extra parts and instead of just joining the two sides of the aeration ring across, I went with a longer piece of 1/4 inch soaker hose and created a hoop. Imagine a clock I had two hoops from 12 - 6 and from 3 - 9 O' clock and on the outer ring I connected my two input air lines to my pump.

The 2nd photo is of a set up where I used a plastic "deck protector" ring which is meant to keep a potted plant off the deck of your house you cut to size, I then used a 4-inch air stone from Walmart driven by one side of a 2-port air pump also from Walmart for $10. All of this then sits inside an 18-quart plastic dish washing tub and the fabric Geo Pot then sits on top of the plastic ring down inside the water about 6-8 inches deep, which then has an overflow on the side of the tub back to the res; imagine the overflow of a bathtub for the basic design concept. As you can see the roots only massively grew on the side with the air stone during this experiment. When the two sides of the plant were given air via an air pump and two air stones, each side getting 1.8 GPH of air from the air pump, the roots took off with amazing speeds and have required higher EC-TDS-PPM's for the nutes and grew at faster speeds.

When I used a same type of air stone to aerate the Rapid Rooter Plugs in a growing tray with seeds within a week I saw seedlings 2-3 inches tall have a tap root as long as my forearm when I lifted it up to transplant them, and the tray which wasn't being aerated the roots of the same seedlings started from seed at the same time at best had roots just starting to come out the side of the Rapid Rooter Plug. Further researching you can look up how even grass on a lawn is aerated to improve its roots and health, I found an AD in a popular cannabis magazine for the aeration ring for pots filled with potting soil.

Would using air stones like this be beneficial? The ones you show are expensive and I figure dropping 4 stone air lines into each pot might have same benefits. at $15 to $20 a shot, those bubblers your showing me would run me over $600 alone, where as I can use stones and save myself $550. The $20 would be a great investment for my special plants I plan keeping indefinitely like my GSC. But most which are autos I feel to spend $20 on isn't worth it. When I get my shed up, I'll be transferring all my plants into 3 gallon pots, though my good ones like GSC will put in 5 gallon. Its when I do this, that I can incorporate the air stones into the 4 corners. Here is a link for what I would like to use. Greenthumb , how do these look to you?: http://www.ebay.com/itm/Aquarium-Aq...9f43d6a24ff5ce8253f37b&pid=100505&rk=1&rkt=1&
or
http://www.ebay.com/itm/10X-Air-Sto...543907?hash=item4182a239a3:g:BQgAAOSwWnFV-nae
or
http://www.ebay.com/itm/4X-Air-Ston...644504?hash=item417fd698d8:g:idAAAOSw-ndTn~nc
or
http://www.ebay.com/itm/Blue-Fish-T...af4e2e8ffb0dee177d3187&pid=100642&rk=1&rkt=1&
and last one:
http://www.ebay.com/itm/Aquarium-Fi...0b4df9a808c5fb38a2e53b&pid=100507&rk=1&rkt=1&
 
No Title

"
Greenthumb commented

On your middle photo, the fan is literally in the corner and honestly I think you are hurting your air circulation there. If you read the manual for a fan, dehumidifier, etc... pretty much anything that requires air circulation around it, including a TV you will note they say "keep so many inches-feet away from everything to allow for good air circulation". Point is if your fan is jammed into the corner like that it would be like asking you to run the mile breathing through a straw, because you are starving the fan of the very air you are expecting it to move. Perhaps move it away from the sides of the tent by 6-8 inches and take note of how much more the air circulation improves.

The other point I'd make is to note your intake fan, it appears as if the intake air comes right in and hits the pot sitting right there in front of it and won't properly circulate around like you are hoping it will. If possible try helping to dump the incoming air above the height of the pots so it will circulate better, maybe use one of those adjustable metal elbows to just raise the intake air height up a little, or even use a small piece of flexible duct... either way I think if you made these two changes I think you would see you'd notice a difference in the results inside your tent."

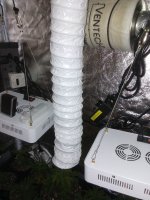
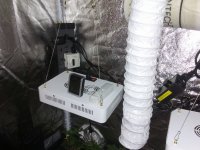
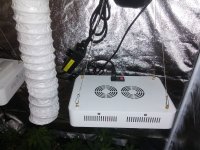
I revamped the grow-tent. I moved the input fan to the top of the tent, then ran a duct down in the middle as the pictures show. I was able to connect the charcoal filter directly to the fan after a few slight modifications to the 4" duct, then relocated the filter to the back of the tent. I changed a few square gallon pots to the tall round ones to make room. Turned an empty pot upside down and placed the fan on top of it to circulate the air all around the tent plus since its higher then the plants (for now), nothing to block it. All high voltage wires are all out of reach and the only wires on the ground are 12V.

I have a video I took as well, but will add it as soon as I figure out how to upload it here. Found a scout ant inside which is surprising because the entire house is sprayed with an ant spray that normally kills them moment they get in the house. This one wont be reporting back. I also caught something flying by as I video taped the tent in operation and hope it wasn't a fly. Last thing I need is a bug infestation inside my home >_<.
 

Attachments

  • photo8498.jpg
    photo8498.jpg
    3.1 MB · Views: 2
  • photo8499.jpg
    photo8499.jpg
    3.6 MB · Views: 1
  • photo8500.jpg
    photo8500.jpg
    3.4 MB · Views: 1
  • photo8502.jpg
    photo8502.jpg
    2.5 MB · Views: 1
  • photo8503.jpg
    photo8503.jpg
    2.8 MB · Views: 2
  • photo8504.jpg
    photo8504.jpg
    3 MB · Views: 2
  • photo8505.jpg
    photo8505.jpg
    2.8 MB · Views: 2
One other thing. I have two 1200w led light panels in the 2x4 tent. I have two 1000w led light panels I have yet to use and was wondering if putting one or both in the tent with the 1200w be overkill? Was thinking either overhead or one on each side.
 
Back
Top