What's new
GrowWeedEasy.com
You're browsing as a guest. Sign up to join the conversation, share your grows, and get help from thousands of fellow growers — it's free and takes less than a minute.

Transplanting from solo cups. Easy way.

Jordann

New member
oldjarhead100
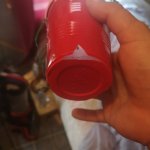
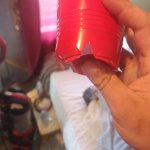
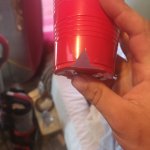
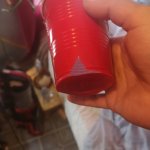
I start by cutting along the edge of the bottom. Maybe 3 or 4 around the bottom, then a triangle pointing up from the center of that slit with the top point pointing to the rim. Just big enough that your soil doesn't come out(too much anyway but small cost to pay) when I'm ready to transplant I can just tip the cup on its side, not any further for any soil to drop on the leaves and shit. With the cuts in the bottom I just push the bottom, I can push about an inch into the cup and it nicely pushes the root ball right out of the cup. I figured this out like 5 years ago by accident after over watering some under drained cups and never looked back it's like night and day. I used to cut from the top of the cup to the bottom on both sides and try to remove the cup from the root ball or squish the cup and try and work it out upside down. My way I haven't damaged a root ball in a long time and they're is almost no recovery time after transplant. The pictures don't do it justice but you get the idea I'm sure. Let's use our imagination 😁
 

Attachments

  • photo106933.jpg
    photo106933.jpg
    1.1 MB · Views: 1
  • photo106934.jpg
    photo106934.jpg
    1.1 MB · Views: 0
  • photo106935.jpg
    photo106935.jpg
    1.1 MB · Views: 1
  • photo106936.jpg
    photo106936.jpg
    1 MB · Views: 1
Last edited:
I just cut the cup and lift the whole thing out. If OP doesn't mind, I have a big tutorial type post with lots of pics that I can copy and paste here. I did it for another member about 4-5 months ago. It's just another way to do it, not necessarily any better but it works for me. Next time I'll try to remember to try it Jordann 's way and see if it works any better for me.
 
Yea post it here, FunkyButtLovin. And anyone else with other ways as well. I've also cut the bottom of cups right off and but a screen in the bottom for better drainage and that works well for pushing them out as well. I like anything that doesn't involve flipping it right upside down.
 
I pack the coco in the new pot around a cup the same size as the one the clone is in so that after I get the clone freed from its cup I only have to drop the whole mass into the cup-shaped hole in the coco. It's very satisfying how slick that happens.
 
Ok here we go, I hope this works and lets me post all the pics. We're going to transplant this little Strawberry Cheesecake autoflower from a solo cup to a 2 gallon using Happy Frog and Ocean Forest soil.

Here's the lady that is looking for a new home. Note how shallow the soil level is in this one so that we can match it later when prepping the new pot.
filedata/fetch?id=365761&d=1578874252

First I add soil to the bottom of the pot and give it a light pack then set the cup on top. Add or subtract the amount needed to get the lip of the cup about even with the top of the new pot. In this case, I ran out of Happy Frog at this point and switched to Ocean Forest since I had an open bag handy. It took one more cupful after this photo to get me where I wanted.
filedata/fetch?id=365762&d=1578874572

I then replace the plant with an empty cup and center it in the pot. In the picture it looks like I'm about to dump the soil but first I hold the cup firmly as I pour it in so the incoming soil does not disturb the centering. The fourth picture shows how I would be holding the cup as I dump/dig in bag/dump/dig/dump.
filedata/fetch?id=365763&d=1578874849

This is how I would have been holding the cup in place the whole time. I fill in around the cup while holding it until I get the level to the approximate level of the soil in the cup with plant.
filedata/fetch?id=365764&d=1578875031

Now I pack the soil moderately with the back of my knuckles like a gorilla. Keep holding the cup or use both hands on opposite sides for even pressure while doing this so you don't disturb your centering! I'm only doing these things one handed because I'm trying to show what I'm doing while taking pics.
filedata/fetch?id=365765&d=1578875215

This is what it looked like when I had the new pot prep finished.
filedata/fetch?id=365766&d=1578875383

Here are the cheap scissors I use and the starting cuts I make to the cup up and down on both sides about halfway across from each other to split the cup vertically.
filedata/fetch?id=365767&d=1578875691

Hold the cup with the hand that you're not using to take the picture with and carefully tear down one side of the cup until you get one side from top to bottom.
filedata/fetch?id=365768&d=1578875819
filedata/fetch?id=365769&d=1578875869

Now carefully tear down the other side then fold one side open and it should look something like this.
filedata/fetch?id=365770&d=1578875930

Carefully spin and pull the cup straight up and out of the soil leaving a hole that looks like you removed a plug of soil.
filedata/fetch?id=365771&d=1578876082

Now I use my fingers to get under the bottom edge that is exposed by folding back the cup and carefully slip them up and under the root ball as lift it out of the cup.
filedata/fetch?id=365772&d=1578876224

filedata/fetch?id=365773&d=1578876274

Next I gently glide the root ball right into the perfectly snug hole we made earlier.
filedata/fetch?id=365774&d=1578876388
filedata/fetch?id=365775&d=1578876416

I added more soil until I was just above where the cup was and watered it in, this time with about 20oz. of 6.5 pH water. It won't let me post that pic, exceeded the number of attachments but it's pretty basic, just adding water.

All done!!!
 
Nicely explained. I go the same route for setting up my larger pot but as it grows and the soil compacts I lift the root ball and add to the bottom instead of burying more of the upper stem. Roots grow down better than up. But I like this. You're giving me ideas.☺️
 
One of these days I'll go full coco. I have about 30 percent in my soil mix with some promix michrohaize and abit of my composted baked soil then about 50 percent perlite to soil mix. I've always liked having soil in the mix it gives me some wiggle room with water and feed.
 
Same I used to keep adding on top then once I harvest and dump the soil I have 6 inch of useless on-top of my roots that just makes it harder for them to get good oxygen and to not over water them as it just holds unused moisture.
 
Same makes it so much easier. Then I like to cut down the sides of the root ball to get the roots to spread out faster.
 
Back
Top