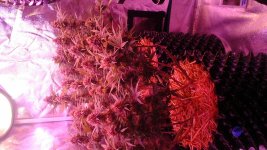
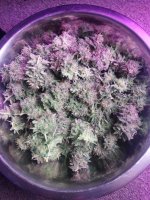
Hi DingusKhan, yes, I have found others who do it, when I first read on it seemed Crazy to have still water sitting around in my tent. But, from what I understand, it can be done.
not sure if I can post outside links... but the original post in 2012 on grass city by noobwannb
"This method is especially effective with organic soil, and was designed with it in mind, but I see no reason that it wouldn't work with bagged soil. It does go against everything we've been taught about the wet/dry cycles, but with organic soil the benefit of keeping it evenly moist is huge.
I love the health and vigor I've witnessed with a SIP (self irrigating planter) system, but have no room for 5 gallon buckets in my grow room. Frankly I like to keep my plants smallish and love the benefits of fabric pots as well, so I went looking for something that would provide the evenly moist condition for the soil (the benefit) without using large self contained buckets full of soil and came up with this. It's also noob proof since one of the easiest (and deadliest) mistakes to make is overwatering and underwatering. Anyway, here's the method."
1. You want a tray to hold the wicking material and water. Doesn't matter what size, kind, etc...you can use a plant saucer or a plastic swimming pool or anything in between. I started using seed flat trays and have moved up in size since.
More volume means more water/medium means less maintenance, but it's up to you. Also, the larger the tray the more pots you can fit inside.
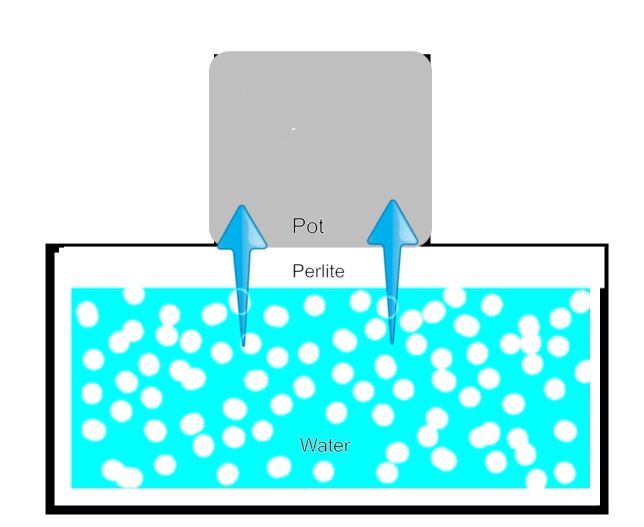
2. You need to fill the tray with wicking material. I use perlite and think this works best, but I've been told that lava rock, hydroton and the like works also. ROCKS, stones, and anything that is bio degradable will NOT work. The stones won't wick and you don't want to use something that will break down causing issues with mold, smells, etc
3. Add water. I like to use an inverted water bottle so that I can gauge the water level but it's not necessary. The perlite will soak up the water so keep adding until it's at the level you want it which can be anything YOU want it to be, but I suggest at least an inch below the top of the perlite. The reason for this is you don't want your pots sitting directly in the water.
Add your pots (simply set them down) to the top of the perlite.
-You WILL have roots growing out of the bottom and sides if using a smartie after awhile. This is normal, and they usually dry up after awhile.
-You MAY see white mold on top of the soil for a few days (Santa's beard) until the system regulates itself. This is a good thing and nothing to be alarmed about.
-You may (probably will) see a slight discoloration of the top layer if using perlite. This is algae because of the damp conditions and high light. It won't hurt anything, but if it bothers you, you can either cover the top with landscape fabric, black plastic, whatever, but I don't suggest using anything between the perlite and the bottom of the pot. Either cut holes or drape it around the pot(s).
*I now line my tray with weedblocker fabric before adding the perlite and leave a good amount of excess before cutting. After the perlite is added, I bring the excess up over the perlite and tuck it around the pots. It shades the perlite, and helps hold moisture in the tray as well....perfect.
Once the roots start growing out the bottom, within a few days the growth up top will explode because the plant has a steady supply of good, moist living soil, and that's because the soil has a good steady supply of water.
Enjoy!
---------------------------------
* You CAN use hard pots, but smart pots work best. When you place hard pots make sure there are drain holes on the bottom of the pot, and push the pot down inside the perlite a bit so that it makes good contact with the soil through the drain holes. It's probably best to avoid moving hard pots much so that the wicking (via the drain holes) isn't interupted. You can move smart pots around as much as you like.
* For teas and drenches, I suggest top watering outside of the tray..pull the pot out, water it with whatever and let it drain a bit before returning to the sip tray. I suggest this because imo pouring things into the res that have the potential to rot and smell doesn't appeal to me, but it is of course your choice. I found out the hard way using hydrolyzed fish ferts....not a pleasant clean up experience😉
* Works GREAT for seed starting and cloning as well.
ADDED: Though a common reservour (fits more than one plant) is convenient and has it's benefits, I've found one disadvantage is in taking photos....if good pics matter to you, you may want to go with individual trays.
I challenge you to try this even if on a small scale with one plant...especially if you like smart pots. You're gonna love it😊
ADDED: It's worth noting here that a good FLUFFY (well aerated) mix will go a long way toward the success of this system. Wet compacted soil is NOT healthy for the root systems. I currently use 1/3 by volume aeration (perlite, rice hulls, etc) then add up to 1/4 MORE when I pot up. Works VERY well for me as you can see from my rootball post harvest








 , I recently read an article on watering practices which is very much like you do, in the article tho they put the pot into a saucer(big black plastic ones)and poured the feed into the saucer, to be drawn up into the medium.......they filled 1" or 2" high then left it, and repeat until the water was no longer being drawn up.....but at the end they expressly stated not to leave the pot with access to water when the medium was wet enough, as the "dry" cycle would not begin and the risk of root rot(as