What's new
GrowWeedEasy.com
You're browsing as a guest. Sign up to join the conversation, share your grows, and get help from thousands of fellow growers — it's free and takes less than a minute.

RAPID ROOTERS - CFL - Purple Kush - Germination exeriment

growdc

New member
OK folks, here goes it, after all the pier pressure....... I will start a journal of sorts, but a little different. I SUPER ASS suck at germinating. (If our mighty Nebula & Sirius allows me to post this, there'll be a next one on cloning!!!) I suck at both of them. Hope I can get all help I can and you folks can see what I might be doing wrong.

Recently, I chanced upon a friend of a friend of a friend on Facebook that magically and was kind enough to send me 20 seeds of what he says is Purple Kush. He kinda said just use them to practice germinating. After they germinate, you're done, throw them away. I was like "WHYYY???". He said this, and I still don't understand so maybe someone can explain. He said "They are just regular F1's." I was like "OK, cool..."

So, whether they germinate and then die or germinate and will turn into a monster to eat me........ I hope some one can help clear that up, but for now, I went all out to get what I needed for germination.

Equipment
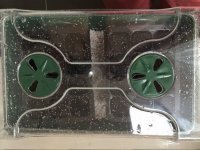
EarlyGrow Medium Domed Propagator, 15" x 9" x 7"
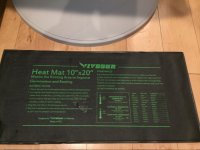
VIVOSUN Seedling Heating Pad 10" x 20.75"
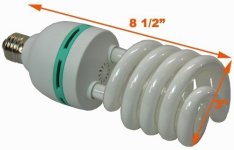
Full Spectrum CFL Grow Light Bulb 60 Watt Bulb 5500K H60
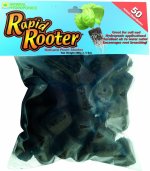
Rapid Rooter Plugs (x20)
Espoma Perlite
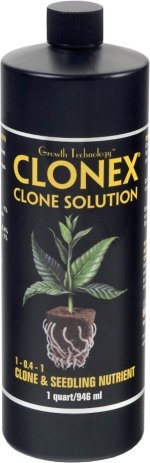
Clonex Solution
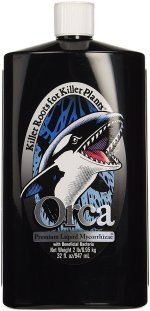
Orca Premium Liquid Mycorrhizae
Petco Aquarium thermometer tape

So the reason for all this equipment. I was on Nirvana's seed website and they were selling this pretty cool propagator kit. In it, seemed like any other kit, except they had perlite and Mycorrhizae powder. I watched their promotional video and though, hey, I'll try to copy it.

And then I realized I accidentally hit post when I'm not even done yet. New post then.
 
Last edited:
No Title

List & pictures of the exact stuff I'm using. Everything was ordered from Amazon.com except the Petco Aquarium thermometer tape. It was about $2.00 at Petco in the Aquarium section. I have to say this propagator dome is built like good Tupperware. It's strong and solid. Really like it.
 

Attachments

  • photo22331.jpg
    photo22331.jpg
    334 KB · Views: 1
  • photo22332.jpg
    photo22332.jpg
    278 KB · Views: 1
  • photo22338.jpg
    photo22338.jpg
    111.1 KB · Views: 0
  • photo22339.jpg
    photo22339.jpg
    52.7 KB · Views: 0
  • photo22341.jpg
    photo22341.jpg
    483.8 KB · Views: 1
  • photo22345.jpg
    photo22345.jpg
    543.8 KB · Views: 1
  • photo22346.jpg
    photo22346.jpg
    243.7 KB · Views: 0
PRE-SETUP (Now, don't ask my why I do what I did, it just seemed a culmination of everything I've read every where, bull shit or not, so I hope you guys can tell me).

1. I dumped all 20 F1 whatever seeds into a glass of tepid tap water. Now I heard that I shouldn't have used tap water, but too late. :( They were placed in my pantry.
2017-06-16 Seeds in tap water.JPG


2. I dumped 21 Rapid Rooters and a handful of perlite in 3 Liters of RO Water + 6 mL of Clonex Solution + a couple of drops of Orca. PPM = 200 ppm and pH was about 5.9.
2017-06-16 Rapid Rooters & Perlite soaking.JPG


Step 1 & 2 sat for at least 24 hours. Again, no rhyme or reason.
NOTE TO SELF!!! NEVER HANDLE PERLITE WET. IT SUCKS!!

SETUP

1. Rinsed out tray and dome with just plain water, figured it was brand new.
2. Plugged in the heat mat.
3. Took the cup and poured most of the water out, (OH! At first, all the seeds floated. They all sank after 24 hours.)
4. Just dripped in enough Orca to form a thin layer of liquid over seeds while I prepared the plugs. (again no idea why I did it.)
5. Took each plug from soaking solution, tried to get all the stupid perlite off, and swung it in the air once to get rid of the soaking moisture and put it in it's respective tray. This this 20 time with 1 spare plug left. 6. Removed the plug, drained most of the Clonex solution, and poured the perlite into the tray and made an even damp perlite layer. Damp from the Clonex Solution.
2017-06-16 Tray with Perlite.JPG


7. Placed each seed into the Rapid Rooter's hole. Again read somewhere of the anatomy of a seed, that it's best to insert tip side up (versus the popular belief of tip side down-sure whatever. LOL) But was also advised to have an extra rooter on hand, hence the 21st one, and I used tweezers to pinch off a little bit to plug each of the holes to have the seed flush with the rooter I guess.
2017-06-16 Rapid Rooters.JPG


7. Placed all 20 rooters in their little holders onto the perlite in the tray that is set on the heat mat.
2017-06-16 Rapid Rooters in tray.JPG


8. Covered with Dome, vents fully opened.
2017-06-16 Dome.JPG


9. Opened the package of the Petco Strip Thermometer and stuck it on the side of the dome.
2017-06-16 Dome with temp.JPG


10. Final set up with CFL Light. CFL light is placed 28" from top of dome. No idea again if this is the right height.
2017-06-16 Final.JPG


11. There is a fan as you can see blowing on low that osccilating. I figured it would help with the condensation. I saw a you tube video of what a guy calls too much condensation and since all my seeds were rotting in the past I thought i shouldn't let it condensate so much hence using the fan and perlite.

2017-06-16 Too much condensation.JPG

** So, according to this Grow Boss fella, the picture above is WAY TOO MUCH condensation. Apparently you should be able to see right through the plastic with maybe that type of condensation like just a tad bit on the side of the dome...... So, I keep opening it up do let if evaporate off until I can get that effect. Will post another pic if I can.
 
Wow, that seems like a lot of work.

I recently attempted to germinate 4 seeds and luckily, I went 4 for 4.

Simple method.

1. Soak for 24 hours in RO water.
2. Paper towel method till seeds cracked.
3. Placed seeds pointy side down in Rapid Rooters.
4. Placed Rapid Rooters in propagation dome in shallow pool of RO water. I would have placed them directly in my fabric pots but my coco and perlite wasn't ready.
5. Kept in my tent in full light at ~ 78°F.

3 seedlings up 3 days after soak, last seed was a day behind.

Next time I will skip the paper towel even if the seeds aren't cracked after the soak and I'll place the Rapid Rooters into my final pots.

Good luck with your seeds and thanks Green75 for answering my all of my questions along the way
 
Not sure if it's a lot of work, or me just being long winded. LOL.

Well, I have done it this way or that way or whatever way, but I get 1% germination rate. In 2 years, I only got 2 seedlings to grow to maturity. Don't even talk about cloning. I have a brown thumb.

So, thank god for 20 seeds. I can now eliminate the fact that I just got bad seeds (statistically) or I actually don't know how to germinate worth shit. LOL
 
I soaked the raid rooters in hot tap water, squeezed them out, tore a small piece off to cover the holes and placed in a germination station.

That was my second try and third since I screwed up afterwards worked great.
 
Yeah yeah..... I see your journal. So just plopping the seeds in did nothing? Then you started 2 new ones BUT plugged the hole and in 3 days they sprouted?
 
I'm no scientist but F1 is a term used in breeding for first generation hybrids (or single back crossed) meaning they've only crossed once with one of the parent strains. After around 3 crosses with the same male the cross gets relatively stable and breeders release strain crossed up to 6 ones or more to get closer to a monocrop
 
Ok @formernuke........ when I wake up in the morning, it will be the 3rd day. If nothing happens......I need to hire a germinator!!
 
What's the worst that could happen is I allow an F1 to flower to maturity? It's not going. To be halfway genetically unable andcrumble and die will it?
 
No man not at all. It just means the breeder cannot be sure how the plant will turn out. Could be tall could be short. That kind of things
 
Hey growdc , I'm subbed in mate..........all i did last time to germinate was soak in water for 24hrs, then plant seed into the ready mixed and moist coco, in the pot it's staying in about half inch down, then get the top of my humidity dome, it's just like yours, and put that on top of the coco, then into the tent, 3-4 day's later..........broke surface:)
 
Last edited:
i tell ya.... brown, black thumb.......... technically, following exactly what you did, something should sprout tomorrow. If it doesn't, I blame the F1 seeds. LOL
 
Back
Top