What's new
GrowWeedEasy.com
You're browsing as a guest. Sign up to join the conversation, share your grows, and get help from thousands of fellow growers — it's free and takes less than a minute.

HYDRO New RDWC setup for 4'x4' tent project.

UndergroundFarmer

New member
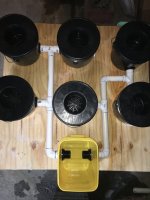
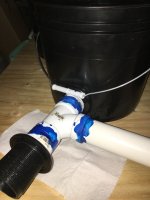
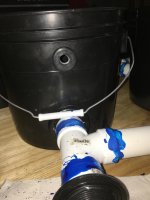
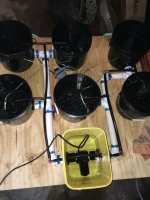
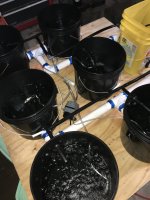
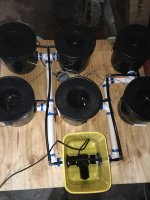
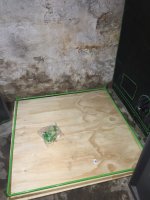
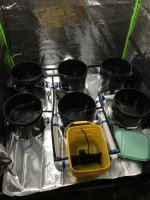
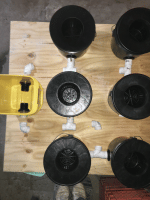
This is the fruit of an afternoon's work. I bought a 4'x4' piece of plywood to fit under my new tent to level it on an uneven basement floor. It made a nice table for figuring out the details of how to arrange the buckets and saved me the aggravation of having to build it inside the tent. It will be a six bucket recirculating deep water culture setup with a kitty litter bucket for a reservoir up front and center when the tent is open. Three of the buckets will drain to each side of the reservoir. I'm using 1.5" PVC pipe and fittings that thread into bulkheads on each bucket. A leak check proved that the threaded pieces required silicone sealant to keep them from dripping. Currently, the whole thing is sitting overnight letting the silicone and the PVC cement cure before I mess with it again. PVC elbows laid out show where the rest of the PVC pipe will go once all is ready. Once all the PVC is glued and cured, I can remove the nuts from the bulkheads to disassemble everything until the new tent can be moved into its space.

The reason for the spaces either side of the reservoir is so I can flower out moms that I get tired of without having to take them out of coco. I'm considering trying to be cute about it and pulling tubing for the air stones through the PVC return lines so there is less exposed tubing in the tent.

I'm open to suggestions if you've got 'em.
 

Attachments

  • photo104493.gif
    photo104493.gif
    2.9 MB · Views: 2
Hey UndergroundFarmer! Looks like a nice setup. I think it would be wise to run the air stone tubing through the return lines but my question is would you run them into your reservoir bucket then to each grow bucket or would you try to insert them outside of the main res? Either way would work but the second option seems like it would be prone to leaking versus the first option. The only thing I'd make sure is to try to not let any light in where you add the holes regardless of which method you choose.

One other question...will your grow buckets be the same level as your main res or will they be higher? I'm only asking because I'm trying to understand the way the system works. I assume you place a pump in the main res that splits to the 6 grow buckets and then they drain back to your reservoir, but without gravity to help with the draining, wouldn't you need another pump? I've just never set up a system like this and have been considering doing one soon.
 
Not sure if I would run the air tubing through your return lines. It may make your system prone to clogging and I think it would cause uneven aeration. I would just run the main line to the middle and use a splitter that controls the flow of each line.
 
I've got a 6 way splitter/reducer that came with my air pump. The big air line would come in a single hole in the reservoir then split to 6 aquarium tubing lines to each bucket. It sounded cool but I think I'll just tie the water and air tubes together.

The cat litter bucket is a bit taller than the 3.5 gallon buckets. It will sit at the same level as everything else. The pump will go at the bottom of the res with a line out that breaks off to each bucket. All seven buckets will automatically keep the same water level because a higher column of water in one will outweigh the others and that column will go down until they are all level. Also, the pump pulls in as much water as it pushes out.
 
I don't understand what there is to clog? It's a return line and it seems large. The air line is like 1/8 tubing. If you pull it tight, it should sit toward the top of the pipe. Maybe I'm missing something?
 
The roots in mine tend to follow the water current. If I don't trim the roots it will slow down the water flow because they get in the return pipe. I would imagine the same could happen with his, maybe moreso with air tubing inside. Or another example, the water current could be so high that it sucks the air stones into the pipe blocking it that way.
 
I plan on setting the pump low enough that roots getting sucked in shouldn't be a problem. This thing is definitely getting run without plants in it until I'm satisfied it's right. The big flaw of the setup it will replace is that the pumps are running wide open so the venturis will work but roots keep creeping into the intake. I usually have to clear them out 2 or 3 times before harvest.
 
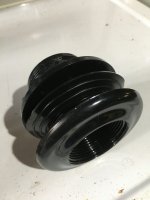
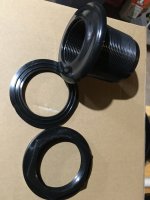
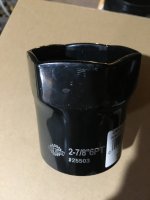
Update: I took this day off to cut and glue up the rest of the setup. I even filled it halfway to check for leaks. Luckily, the only ones were seepage at the bulkheads of three buckets I haven't been able to torque down yet. The issue is using a bulkhead made for flat walls on a curved one. I am awaiting a 2 3/4" lock nut socket for trucks from Amazon to be able to tighten and loosen them any other way but by hand. I'm tempted to switch to kitty litter buckets like the reservoir is but I really hate to waste the six I'm already using. I also don't like to give up the extra vertical grow space I'd lose if I switched. Looks like silicone may have to come in play on final assembly. Also, harvest may only be about two weeks away!
 

Attachments

  • photo104808.jpg
    photo104808.jpg
    1.6 MB · Views: 2
  • photo104810.jpg
    photo104810.jpg
    1.1 MB · Views: 2
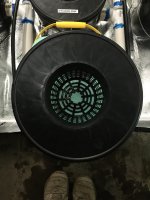
This weekend I made epic progress! Saturday morning I was about to abandon the whole thing. The three leaks at the bulkheads turned into six leaking buckets. In desperation, I tried it with the rubber washer placed on the outside of the bucket wall instead of the inside. The giant socket in the 2nd picture was necessary to tighten those stupidly wide nuts. I only use a ratchet to loosen the nuts - never torque plastic stuff down hard. I only had to hand-tighten the nuts with the aid of the socket to get every one of the buckets to never leak again - at the bulkhead anyway. Some of the PVC joints must have cracked a bit from being moved around. I wish I'd bought regular PVC cement and used plenty. The blue stuff is for irrigation systems and sets quickly. I had to paint over every one of those joints again with more cement to seal them off.

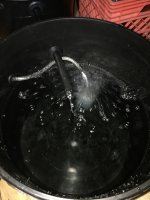
The water tubes were tricky because I bought a bunch of stiff line that doesn't work very well with some of my barbed fittings. I had to flare out the tubing to get it to go over the two elbows on either side of the reservoir. The grommets were installed using a one inch paddle bit for irrigation and a 3/8 inch bit for the grommets for air tubing that I serendipitously found in my stuff just before I needed them. Here's a tip I learned from a video of a RDWC builder: Start your paddle bit or hole saw normally until the center punctures the side of the bucket then reverse the drill and finish making the hole. The hole will be much cleaner than it would be if you drilled the hole normally. All openings for water lines were made 8 inches from base. That way, the ones in the reservoir help establish a line to fill it no higher than. After installing the water tubing, I figured out the minimum length the longest piece of air tubing needed to be and then cut all six the same length. The air pump came with a short piece of tubing and a reducer manifold with six attachment points and was perfect. All six airstones run evenly. The water tubing inside the buckets was then trimmed so the net pot lids would fit. The pump is an old Sunleaves 240 g/hr. It is just the right speed so that water will circulate but not so fast that roots will be pulled into the return lines - I hope.

All of this effort was spurred on by an inspection of the current flowering tent. Skywalker OG had yellowing leaves at the buds and by my watch it's just starting week 8 of flower. So in addition to all the fun I had getting my RDWC built, I got to start flush week!

Hope y'all had at least as much fun!
 

Attachments

  • photo105814.jpg
    photo105814.jpg
    1.3 MB · Views: 1
  • photo105815.jpg
    photo105815.jpg
    1.2 MB · Views: 2
  • photo105816.jpg
    photo105816.jpg
    1.3 MB · Views: 1
  • photo105818.jpg
    photo105818.jpg
    1.2 MB · Views: 2
  • photo105819.jpg
    photo105819.jpg
    1.5 MB · Views: 2
  • photo105820.jpg
    photo105820.jpg
    1.3 MB · Views: 2
  • photo105821.jpg
    photo105821.jpg
    1.5 MB · Views: 1
  • photo105822.jpg
    photo105822.jpg
    1.5 MB · Views: 2
Perseverance...
You've discovered the reason why I dislike using round buckets for RDWC-it's always a nightmare to keep them from leaking.
I can tell you from my 3 years of trying to make it work that unless you can use at least a 2" diameter drain, root clogs will always be an issue.
 
It's not shown very well but if there's another RDWC project in my future, I will be using the litter buckets that are currently supporting the current project! I liked the low profile black buckets because they are just tall enough to grow in. I have only about 80 inches floor to ceiling in the basement so maximizing vertical space is helpful. The net gain of using the black buckets over using litter buckets is only a matter of about 5 inches so the virtually free litter buckets with the flat sides win. I've got fingers crossed that the slow pump won't suck the roots in. I suppose the one advantage of the round buckets and tops is that I could possibly rotate the top to pull roots out without lifting the lid. As it is, I'm clearing a clogged pump 3 or 4 times a grow with the present setup, so I'm no stranger to unpleasant hydro chores.
 
It's alive! ALIVE!

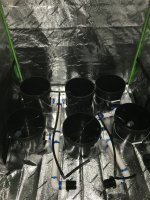
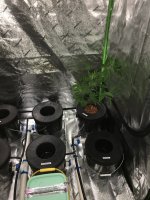
Over the past two days, I've gotten the new tent put up and the clones transferred from coco to hydro. I had to assemble the tent from inside because of the tight fit from floor to ceiling. I let everything run with plain water until this morning and awoke to no leaks. That's when the real fun began. I had six clones in coco that had to move to hydro. After adding nutes & fixing pH, I took them one by one and knocked what coco I could out of the root ball. I was a bit surprised just how much of the coco they'd reached into with very fine root hairs. When they were as clean as I could get them, I dipped the root ball into a tub of water to get off what coco was left. That also had the nice effect of condensing the whole mass of roots into something skinny enough to hang through the cutout centers of the netpot lids. The whole thing was then filled with hydroton then on to the next clone. While I had the coco stuff out anyway, I moved the four young moms-to-be from their cramped one gallon pots to three gallon pots where they'll probably be for good. They are Acapulco Gold, Laughing Buddha, Purple Haze & Blueberry. I'm learning fast that Blueberry doesn't seem to be as much of a hog for nutes like the other three. I hope to have clones from these ladies in my next grow after this bunch of clones are done. Next week, it's on to building a RDWC for the old tent.

The grow:
Black Widow Black Widow Bruce Banner
Granddaddy Purple Granddaddy Purple Black Widow
 

Attachments

  • photo106701.jpg
    photo106701.jpg
    1.7 MB · Views: 3
  • photo106702.jpg
    photo106702.jpg
    2.3 MB · Views: 1
  • photo106703.jpg
    photo106703.jpg
    1.6 MB · Views: 2
  • photo106704.jpg
    photo106704.jpg
    1.8 MB · Views: 1
  • photo106705.jpg
    photo106705.jpg
    2.1 MB · Views: 2
  • photo106706.jpg
    photo106706.jpg
    2.1 MB · Views: 2
UPDATE: Maybe it's because those clones waited so long or maybe it's better pH/TDS management but I have lots of white pistil hairs on day 9 of flowering! Also, using the combo pH/TDS/thermometer pen that replaced my old pH pen that died has kept me from burning the leaf tips for the first grow ever. The girls have very nearly filled the screen and will get another round of defoliation next weekend. The RDWC project for the old 3'x3' tent is past the hard part - the PVC return manifold has no leaks after holding water for two days. I can plumb the water tubing and make holes for air tubes then it will only need holes made for net pots. Is there any advantage to using 5" or 6" net pots over the "standard" 3" ones? My hydro store is out of the bigger ones and I have plenty of 3" pots that haven't even been used yet.
 
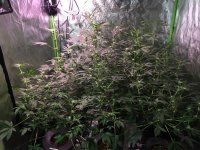
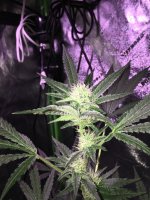
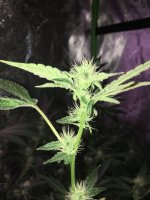
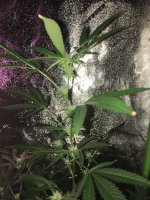
I drained and flushed the whole system this morning to try to get the last bits of coco out before giving them food to start week 3 of flowering. The first picture is the tall Black Widow in the center of the back row showing budlets after only two weeks of 12/12. The second is the canopy after getting a big trim below the net. I wish I'd remembered to get a before picture! All three strains are showing budlets. The two smaller BWs at left rear and right front are only starting to flower. I wish they'd stretch just a bit more. Bruce Banner at right rear is still waiting to really stretch. I'm not fooled even a bit this time! The Granddaddies Purple at front left and center are growing much larger than their cousin from my last grow. That's a relief - I barely got any bud from that one and I really really want to fill at least three quart jars of GDP this time. There's still no nute burn happening either!
 

Attachments

  • photo108929.jpg
    photo108929.jpg
    1.7 MB · Views: 2
  • photo108930.jpg
    photo108930.jpg
    1.6 MB · Views: 1
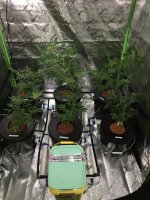
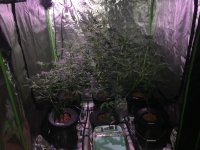
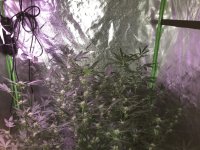
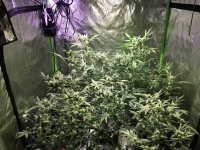
Week four of flower began this weekend. It was definitely time for some defoliation. I got a bit heavy-handed, but the light now penetrates all the way to the floor of the tent. The biggest plants so far seem to be the Granddaddies Purple and the Black Widow at center rear. This might be a monster harvest compared to the last go-round!
 

Attachments

  • photo110375.jpg
    photo110375.jpg
    2.3 MB · Views: 2
  • photo110376.jpg
    photo110376.jpg
    2.3 MB · Views: 1
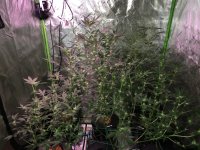
I only had one day to work my garden this weekend so I wasn't around much to post. Week 5 of flower has just started for this batch and I already had to use a yo-yo on a heavy Black Widow cola! During the week, the TDS crept over 800 as a bit too much water evaporated from the reservoir. The GDP was the least affected by nute burn, Bruce Banner seemed to show it the most. Are indicas just heavier feeders? All told it looks like a good harvest coming up in the next 3-4 weeks. The only gap in the ScrOG is caused by a clone of the shorter Black Widow pheno that never caught up with the rest. No worries - the big-ass one at center rear should produce enough to make up for it.

I get to spend my upcoming three day weekend cutting clones from Acapulco Gold, Laughing Buddha & Purple Haze for the next crop. I might even flower out a few of the mothers in coco with these clones to make room for newer exploits. Frankly, I wish I could just chuck them outside and let them get enormous.
 

Attachments

  • photo111034.jpg
    photo111034.jpg
    1.9 MB · Views: 2
  • photo111035.jpg
    photo111035.jpg
    1.3 MB · Views: 2
  • photo111036.jpg
    photo111036.jpg
    2.5 MB · Views: 1
  • photo111037.jpg
    photo111037.jpg
    2.4 MB · Views: 2
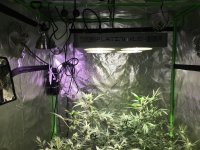
Happy Independence Day to my friends in the states! Yesterday I had the extreme good luck to come out of my basement for a minute to refill my water when I happened to catch a FedEx driver coming to my door. It was the new Advanced Platinum light I wasn't expecting for another week or so! I had to call the company's 800 number last week because nothing was happening with my order. They said they were out of stock for a while. He must have located one and shipped it without triggering a notification email. Porch pirates are a huge problem where I live - there is no way I'd have anything costing this much dropped off at the door. I usually redirect that stuff to a safe location. But I got it while in the big middle of hydro chores and some major stuff-moving in the basement and all was well. The light is in its new home now in the 4'x4' tent. It has as many LEDs as the one I was using but with a better spread for a square tent space and additional white LEDs to use for a boost or for seedlings or for not killing your eyes while you work in the tent. (The white ones are the only ones on in the pic.)

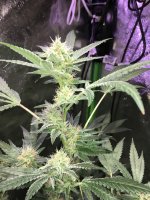
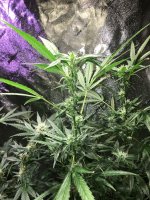
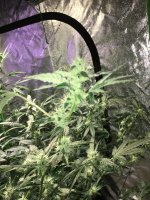
Week 6 of flower is underway with Black Widow already showing orange pistil hairs and some chunky buds. I have two yo-yos deployed for that plant and another one on my bigger GDP. Bruce is not going so crazy this grow but is making decent buds. I lined up the five mother plants for big haircuts and a feeding. Clones were taken for the varieties waiting "on deck" and the aeroponic cloner is running again with no leaks this time. I also took two clones from the Blueberry in the 3'x3' tent for insurance in case the two I already took from her don't root in the RDWC setup.
 

Attachments

  • photo111522.jpg
    photo111522.jpg
    2.9 MB · Views: 2
  • photo111523.jpg
    photo111523.jpg
    2.4 MB · Views: 1
  • photo111524.jpg
    photo111524.jpg
    2.1 MB · Views: 1
  • photo111525.jpg
    photo111525.jpg
    2.6 MB · Views: 2
  • photo111526.jpg
    photo111526.jpg
    2.3 MB · Views: 1
Back
Top