What's new
GrowWeedEasy.com
You're browsing as a guest. Sign up to join the conversation, share your grows, and get help from thousands of fellow growers — it's free and takes less than a minute.

My First Grow Journal...EVER! 600W MH/HPS Bubbleponics Cabinet Grow

No problem. They really do work well in dry climates and they are fairly inexpensive when compared to A/C. Mine was around $350 but it's a really big one. Home Depot even had a different brand on sale that was about the same size as mine for $100 less last week so shop around if you do get one. You could also look at buying a used one since they are easily fixed if something is wrong with them. Let's put it this way....if you can build a hydro grow cabinet, you could build or fix one of them with no problem since it's basically the same components...water pump, fan, drip system.
 
07/10/2017:

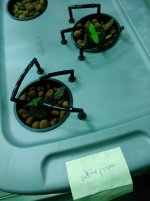
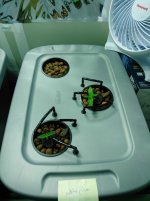
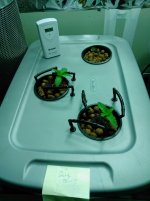
02:00PM: The sprouts are all looking good after their first week of growth! Today was the first water change and the first time I introduced nutrients. Prior to this point, I was only using plain tap water to get the seeds started. I am using the feeding schedule from General Hydroponics. I have attached a copy of it to this post in case anyone needs a basic feed schedule. I am doing both the top and the middle programs, not the expert program. Wanted to start off with the basics and then work my way up from there. As for today's water change, I had bought a submersible pump to empty my reservoirs quickly and easily. Prior to draining each reservoir, I unplugged my air pump and PHed my 5 gallons of water down to around 6.0 using the GH PH Down solution. It appears that it takes about half of the eye dropper per 5 gallons of my tap water to PH it down to that level. I am using a 5-gallon water container to make things easier. I also added my nutrients, 2.5tsp each of FloraMicro, FloraGro and FloraBloom as well as 2tsp of HydroGuard (all per 5 gallons of water). I shook the mixture up really well and let it sit while I drained the reservoir. Using the pump, the reservoir drained in under a minute! I also flushed the bottom with fresh water and then drained that off as best I could. Once that was done, I shook up and poured my nutrient rich water into the reservoir and then turned on my air stones and checked to make sure they were bubbling nicely. I put my lid back on, and repeated the whole process for the second reservoir. Around the same time as I was doing this, my other timer arrived so I set that to come on for 15 minutes every 6 hours starting at 5:45PM today. Basically it should come on 15 minutes before the light comes back on (I have the light scheduled to go off at 12:00PM and come back on at 06:00PM due to the heat) giving the plants a nice watering before they get their first light of the day. So to recap, lights are on from 06:00PM to 12:00PM each day and the water pump runs for 15 minutes at 05:45PM, 11:45PM, 05:45AM and 11:45AM. The air pump, circulation and exhaust fans all run 24/7. I will include some photos of week one's progress when my light comes back on. Until then, thanks for reading!

 

Attachments

No Title

Here are the pictures I promised. Wasn't able to edit the other post and just add them so I made a new post.
 

Attachments

  • photo24370.jpg
    photo24370.jpg
    844.7 KB · Views: 6
  • photo24371.jpg
    photo24371.jpg
    885.4 KB · Views: 5
  • photo24372.jpg
    photo24372.jpg
    990.7 KB · Views: 5
I'm curious why you aren't running the water pump 24/7 along with the air pump and fans.

I'm considering starting a top-feed DWC for the first time next month but everything I've read thus far says to run the water pump 24/7, at least initially until the seedling roots have reached the water in the reservoir below.
 
I wanted the seedlings to search for water so they will grow stronger faster. I initially ran the water pumps 24/7 to get the seeds sprouted. Once they were up and the leaves came out, I swapped to this new schedule. If the water is not there, the roots will seek it out. This encourages healthy root development and prevents the chance of flooding the plants. Too much water can cause them to swell up and droop. But all of this is more experimental than anything. I will probably up the feedings once the roots start moving into the clay pebbles and there is a bit more foliage on the plants. Basically, I figure that what you see above the surface is water storage. You want to exceed that volume a bit but not too much. The Rapid Rooters are holding so much moisture that the pumps simply don't need to run all the times. Like I said, however, once they move past the rooters, I will most likely up the feeding and work into running the pumps full time for a bit. Thanks for your input.
 
I can tell you this much...if I looked down and saw girl parts on me, I would really be amazed! ;) But as for the plants, I am already amazed at how fast they are coming up. I just hope this continues into the flowering stage! :D
 
No Title

07/11/2017:

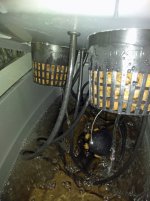
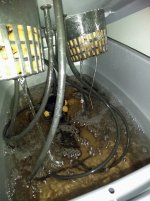
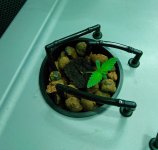
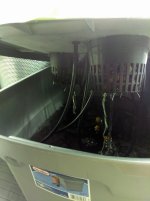
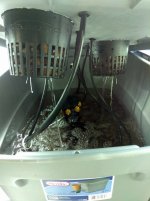
12:00PM: Decided to check on the root growth today and I was happy to see that the three bigger sprouts had tap roots reaching all the way down to the water! The smaller sprout hasn't quite got there yet but it is looking better. Since they are this far along already, I decided to change the feeding schedule to run for 30 minutes every 3 hours. Previously I had it running for 15 minutes every 6 hours but now that the roots are spreading out so well, I wanted to feed them more often. The light schedule has been working out good as far as controlling the temperatures inside the cabinet so I am sticking to that for now. I moved the light as far down as it would go but the inline fan power cord stopped it from going any further down. The plants don't appear to be stretching too bad and the temps are in the low 90s where it sits now so I don't want to burn the babies. I have attached a photo of the root growth below.

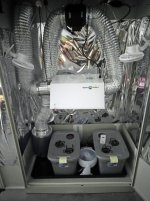
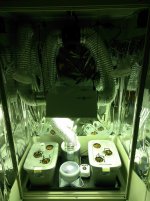
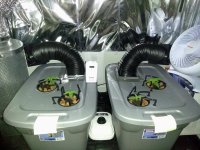
02:00PM: I have rearranged things in the cabinet so that the light hits the plants better. I moved the filter over to the left side of the cabinet and the left reservoir has been moved more to the right. I have a small fan and the air pump in between the reservoirs. I have attached a photo of the change below. What do you all think about this setup versus the old one?

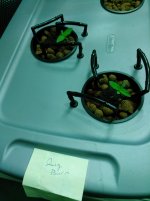
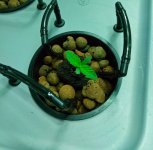
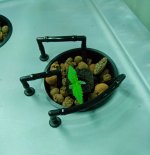
11:00PM: Wanted to update the post with the sprout pictures. I have added them all below. Everything looks to be doing great so far.

Thanks for reading!
 

Attachments

  • photo24425.jpg
    photo24425.jpg
    937.6 KB · Views: 5
  • photo24426.jpg
    photo24426.jpg
    964.4 KB · Views: 6
  • photo24429.jpg
    photo24429.jpg
    885.9 KB · Views: 4
  • photo24460.jpg
    photo24460.jpg
    1,018.1 KB · Views: 8
  • photo24461.jpg
    photo24461.jpg
    951 KB · Views: 8
  • photo24462.jpg
    photo24462.jpg
    592.7 KB · Views: 5
  • photo24463.jpg
    photo24463.jpg
    833.1 KB · Views: 5
  • photo24464.jpg
    photo24464.jpg
    878.2 KB · Views: 6
  • photo24465.jpg
    photo24465.jpg
    795.9 KB · Views: 6
Last edited:
No Title

07/12/2017:

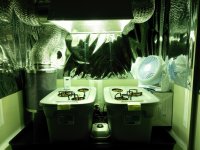
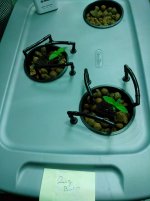
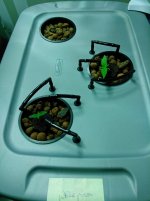
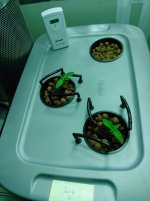
07:00PM: Things are running along smoothly. I have been checking on the plants frequently and they are looking nice and healthy! I moved the light down to about 18 inches above the plants themselves to prevent any stretching and the temps are still very comfortable for them with that all the way down so I am happy about that. Outside, the temps have been very mild with lows at night in the mid 60s and daytime highs only in the low 90s, plus the humidity has been higher than normal since we have had rain the past 2 days (first rainfall since mid May!!) so I haven't had to worry too much about my cabinet temps. I have only been running the fan part of the swamp cooler (basically turned the drip system off) so that it still cools but doesn't increase the humidity since it was at 65% in the garage. It's expected to warm back up but not nearly as bad as it was last week so I will monitor it but everything appears to be settling back down.

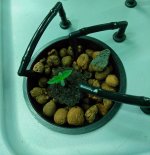
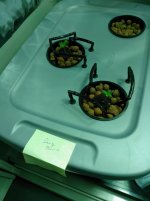
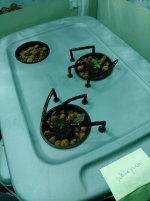
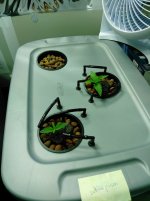
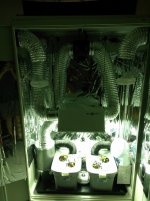
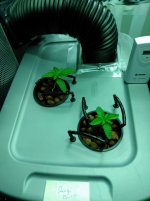
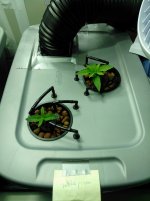
Other updates: I ordered a 2-pack of water thermometers that will go in each reservoir to monitor my temps now that the roots are touching the water. As for cooling the reservoir, I researched a lot of options from simple fans to water heat exchangers and realized that I am very limited on my options due to power draw. I am currently pulling around 10A with everything grow related running on a 20A breaker. The coolers I was looking into each drew 5A and I need 2 of them so that would be pushing my breaker to its limit and I don't want to do that! Not only that, they are very expensive...each costing around $150! So what I decided to do was get in touch with my inner MacGyver and create a tank cooler out of the 2 spare A/C powered computer fans and 2 pieces of flexible duct made just for PC fans (also on order now...) since each fan draws a very low amount of power (each runs at only 6W on a 120V circuit so the amp draw is only 0.05A each or 0.1A total for both to run! They each move about 51CFM of air and can easily be mounted to the duct which will then be mounted to the reservoir via the spare net pot in each lid. The ducting is black, so light won't enter and I can screw them directly into the lid to seal them. What this will do is basically blow cool air into the reservoir which will hopefully force old, warmer air out via the gap in the lid and the hole in the back for the hoses and power cords thus cooling the overall interior of the reservoir and in turn, cooling down the water in it. Basically it was a $35 investment that will either work great or fail miserably. Either way, I am only out a little bit of money versus buying a $300 reservoir cooler! I really only need it during the summer here, since it stays pretty cool the rest of the year and gets really gold in the winter. Once I get everything in and installed, I will post pictures of it to see what you all think. Until then, I've attached a photo of the grow cabinet with the light all the way down, as well as a photo of each set of plants as they sit on day 9! Thanks for reading and happy growing!
 

Attachments

  • photo24510.jpg
    photo24510.jpg
    1.1 MB · Views: 5
  • photo24511.jpg
    photo24511.jpg
    1 MB · Views: 8
  • photo24512.jpg
    photo24512.jpg
    1,023.9 KB · Views: 5
07/13/2017:

01:00AM: Switched the water pumps back to 24/7 operation. Disconnected the timer and plugged pumps in directly. All sprouts have roots coming out of the net pots so time to turn on the water!

Side note: You don't have to cut zip ties...you can simply take the end opposite of the zipper head (the flat part) and insert it into the back of a zip tie. When it's in far enough, the zipper part will release and you can pull the zip tie back out to re-use. I knew this about using a small flat head screw driver or pick, but never thought to use the other end of the zip tie!
 
No Title

07/13/2017: (continued...)

06:30PM: Everything is still running along well. I received some nutrients today, along with my new digital pH meter. Checked on the plants and the roots and they look great! I have posted some pictures below of day 10's status. Thanks for reading and happy growing.
 

Attachments

  • photo24601.jpg
    photo24601.jpg
    1 MB · Views: 7
  • photo24602.jpg
    photo24602.jpg
    731.6 KB · Views: 9
  • photo24603.jpg
    photo24603.jpg
    965.8 KB · Views: 6
  • photo24604.jpg
    photo24604.jpg
    870.2 KB · Views: 6
No Title

07/14/2017:

06:30PM: Installed my water thermometers in each reservoir. The water temps are sitting between 81ºF and 82ºF but I do have a possible solution coming tomorrow. I will post more on that when I get it done, but I mentioned it earlier. Basically it's a fan that will blow into the unused net pot's hole and cool the inside of the reservoir, along with fan the air around a bit to hopefully prevent root rot. Until then, I have posted a picture of each pair of plants as they sit on day 11 from seed.
 

Attachments

  • photo24694.jpg
    photo24694.jpg
    1,008.2 KB · Views: 6
  • photo24695.jpg
    photo24695.jpg
    932 KB · Views: 10
I haven't tried that yet. That is in my list of options should the fan idea fall through. My only issue with that is how much I would have to change out the bottles, but if it comes to that, I will give it a shot. I am hoping the fans cool it down to the 70s. I will know soon...the items I need are out for delivery.
 
No Title

07/15/2017:

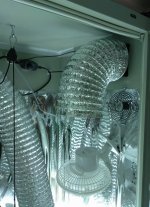
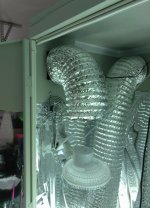
04:00PM: Installed my reservoir fans. However, they don't appear to be doing much more than blowing air in the reservoir and cooling the water temps down a very small amount (only about 1ºF). So now I am going to combine that with the frozen bottle technique. I have 4 20oz bottles that I filled with water to freeze and once they are ready, I will drop one in each reservoir and see how that works. When those are spent, I will swap them with the other frozen pair and re-freeze the others. I imagine this will work fine for dropping the temps down but I will have to see how long it lasts before needing to be replaced with a fresh bottle. Once this grow is complete I will have a number of changes to make before I start my next grow. More than likely I will build my own water cooler for each reservoir and run the lines and everything out of the back of the cabinet so only cool, external cabinet air is blown on the radiator. Either way, I will be more prepared next time than this time thanks to this journal and this website! Until then, here is a picture of the fans I installed today.

06:00PM: I took some of the left over ducting and attached a small piece to each intake fan to help force the cooler air down towards the plants. There are also two clip fans right under the duct to help push it further. I have attached photos of that as well, along with the day 12 progress of the babies. Thanks for reading!

10:00PM: Went to check on the water temps and they have dropped down to 78.9ºF with just the cooling fans. I think I am going to get the high speed versions and replace these with them to double the airflow amount since it does seem to be helping. I also think I am going to move my carbon filter up top to free up space down below which should also improve airflow around the reservoirs. Lastly, I may end up mounting my two velocity fans up top and moving the two clip fans down below to help cool the reservoirs. The velocity fans move enough air on low to blow in the plants around gently and cool the air around them and the clip fans would fit better down below. Either way, a lot of drilling is about to happen so I have to be extra careful since there are babies down below.

Side note: I am waiting for my ice bottles to freeze. They are taking forever so I may have to wait until tomorrow before I can test them out. Will update my post or post a new reply when I get that done.
 

Attachments

  • photo24775.jpg
    photo24775.jpg
    1,004.7 KB · Views: 5
  • photo24803.jpg
    photo24803.jpg
    1 MB · Views: 5
  • photo24805.jpg
    photo24805.jpg
    986.3 KB · Views: 6
  • photo24804.jpg
    photo24804.jpg
    890.1 KB · Views: 6
  • photo24806.jpg
    photo24806.jpg
    955.8 KB · Views: 11
  • photo24807.jpg
    photo24807.jpg
    888.2 KB · Views: 11
Last edited:
Back
Top