What's new
GrowWeedEasy.com
You're browsing as a guest. Sign up to join the conversation, share your grows, and get help from thousands of fellow growers — it's free and takes less than a minute.

Make your own Exhale bags/jars(fungi cultivation)

No3odiesShad0w

New member
This thread is a little off topic but could be used as a supplement to your growing technique. Many ppl like to supplement CO2 to their grows for bigger growth and mushroom bags (ie exhale bags) can be once way to add some to your grow space. I'll show you how to do this with items that you probably already have around the house.

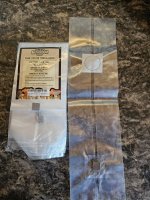
The first thing I noticed with the exhale bags is the CRAZY PRICE!! They want between $30 to $60 for a 1lb bag of colonized grain. A bag such as this would cost a fraction of cost they expect you to pay. I'm this thread I'll show you how to easily and effectively grow your own fungi for all kinds of reasons. CO2 production, medicine, food and for fun! There's no reason someone should be paying $40 for a $2 product that they can easily make at home. Afterwards, you can just toss into your compost for an extra boost of nutrients! You can feed it to your worms 🪱. Just another cycle of life that can work symbiotically with your grow. 🍄+🪴=😍

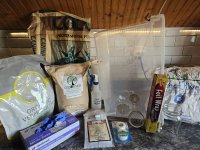
Materials & Ingredients list

Jars (or mushroom bags)
Aluminum foil (heavy duty variety works best)
Jar Ring Lids
Micropore tape
Large pressure cooker or autoclave
2xLarge storage bins (56 gallon)
A CLEAN 5 gallon bucket
Lots of rubbing alcohol (70% not the 91%)
Lots of gloves

Some kind of grain(I like using rye berries but popcorn kennels work, oatmeal, rice and so many others it may depend on the strain you're trying to grow)
Water
Gypsum
Coco coir (I use canna brand Coco. No need to flush the salts like I'm brick Coco. Yes, mushrooms 🍄 don't like salty Coco just like plants 🪴 don't like salty Coco.)
Vermiculite

Syringe with mushroom spores/liquid culture(oyster mushrooms are the cheapest and easiest while producing above average amounts of CO2 [compared to other fungi] but also works with p. Cubensis varieties too.


​​​​​​​Once you have your materials, it's time to have some Fun!

When dealing with any fungi, it's best to keep things as clean as you possibly can to avoid contamination. Especially if you grow at home, The likeliness of bacillus trichoderma being in the air is VERY HIGH and that's the #1 fungi contaminant. Always take a shower before doing any kind of fungi work. Wear clean clothing, gloves, tie up hair and even wear a face mask. We breath out many microbes and possible contaminants. Keep things clean and you can succeed.
 

Attachments
  • photo172256.jpg
    photo172256.jpg
    2.9 MB · Views: 2
  • photo172257.jpg
    photo172257.jpg
    3.1 MB · Views: 2
Last edited:
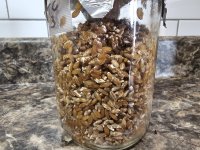
The first step is measuring out your substrate. I'm this case it's rye berries. You can use corn kernels, oatmeal, rice, just about any grain will work. Some work better than others depending on the strain of mushroom you want to cultivate.

I will focus on the jars in this portion and then later do a bagged version (I've never done it in bags before. I don't want to give ppl the wrong info).

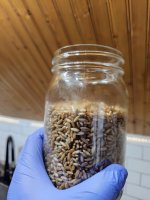
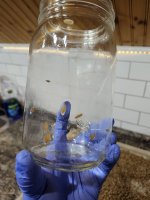
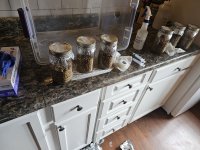
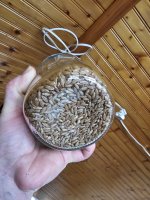
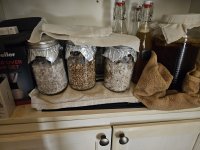
Fill the jar about halfway with your grain of choice. Remember they will expand when soaked and will double in size. Your half jar of dry berries will become a full jar once soaked. I can only fit 3 jars into my pressure cooker so I put 1.5 jars worth of berries into a large bowl. Since the berries will have dust and dirt from the mill, it's a good idea to rinse the berries with clean filtered water until the water runs clean and debris free.

After you have clean berries, add a teaspoon of gypsum and fill the bowl with clean water. Make sure you fill the bowl all the way. The berries will absorb water and will expand. It's good practice to keep them all submerged for proper water absorption.

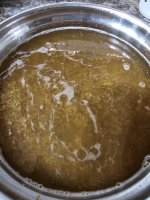
Let the bowl sit for 12-18 hours in a warm spot of your house. You should start seeing bubbles from along the edges. That will tell you that the bacteria and microbes are alive and thriving. It's easier to later kill the bacteria because they're not dormant. Dormant bacteria are much harder to kill.

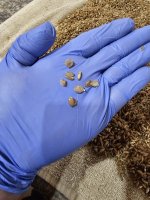
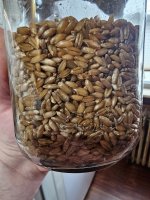
You'll want your grains to look like they're about to burst. They'll have a distinct "tail" on one end of the berry making it easy to tell when it's about to burst. At this point it's been about 12-18 hours depending on your average temps, it's time to move on to the next step!

You can see in the picture the little bits of foam forming on top.
 

Attachments

  • photo170244.jpg
    photo170244.jpg
    2.2 MB · Views: 4
Next step the Cooking and Evaporating of the grains.

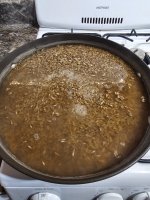
I'm this step you need a large cooking pot to fit your grain and the water you've been soaking it in. You want to bring it to a slow summer under medium heat. Remember you're not trying to cook them and you DO NOT WANT BOILING WATER. Super important! The point of this is to further soften the grain shells and fill them to the MAX with water.

It should take about 15 min to get to simmer and another 10-15 min of simmering and stirring. If you notice the grains are breaking open, you're past done. Turn off the heat and move on to the next part. You want them to swell but NOT break open. Apparently broken open kernels are more susceptible to contamination.

If your grains haven't broken open yet, crank your heat to high for the next 2 min. Get that water as hot as possible and then turn it off.

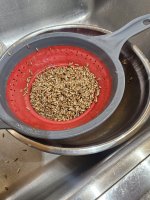
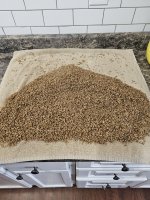
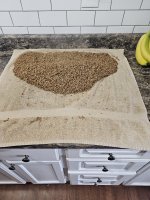
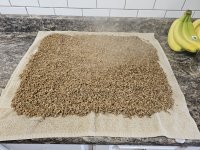
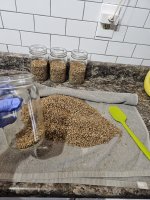
Now while you're grains are HOT and steamy, drain off the water and dump them on a clean dry towel. Make sure you spread them around so that they're not bunched up on each other. In this step, we want the outside of the grain to dry off and the grains to cool down, locking in all that water they absorbed. This is a good time to go through the grain and toss any bad grains, ones that busted open and any other suspicious looking grains into the trash or your compost or the birds. They love cooked grain. And it's better for them than bread .

Keep shifting the grains back and forth. To speed things up, you may want to transfer them to a second clean, dry towel.

To test is the grains are ready for the next step. Put some in a jar. If it gets steamy and wet in there, it's still too warm and wet. You have to wait a little longer. Once it's not steaming up the jars, you're ready to seal the jars for the pressure cooker.
​​

​​​​​​
 

Attachments

  • photo172255.jpg
    photo172255.jpg
    2.6 MB · Views: 3
  • photo172261.jpg
    photo172261.jpg
    2.5 MB · Views: 2
  • photo172262.jpg
    photo172262.jpg
    2.4 MB · Views: 2
  • photo172263.jpg
    photo172263.jpg
    4.5 MB · Views: 3
  • photo172264.jpg
    photo172264.jpg
    4.3 MB · Views: 3
  • photo172266.jpg
    photo172266.jpg
    1.9 MB · Views: 2
  • photo172265.jpg
    photo172265.jpg
    1.9 MB · Views: 2
  • photo172267.jpg
    photo172267.jpg
    4.5 MB · Views: 2
Next step
JARRING AND SEALING

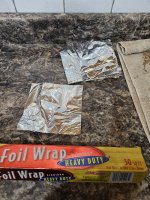
After the grains have cooled, it's time to jar them up. If they're still warm, take this time to cut your aluminum squares. You'll need 2 squares per jar. I usually rip a wide rectangle and then cut it in half.

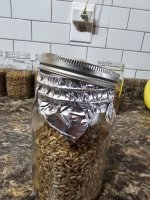
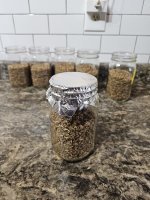
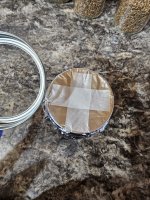
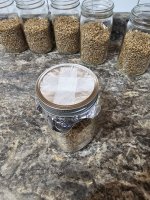
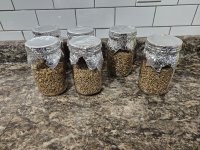
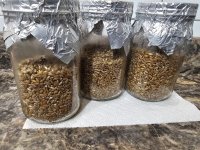
Fill the jars to about where it starts to taper off to the lid. Take one piece of heavy duty aluminum foil and gently cover the jar. Make sure it's nice and tight, using the jar Ring to help give you a perfect seal.

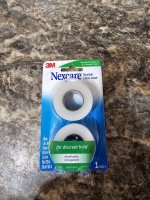
Before you secure the ring, place an X or even just 1 strip of micropore tape. This will help prevent your foil from tearing when you puncture it with the syringe.

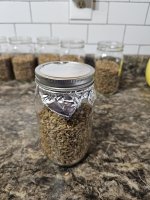
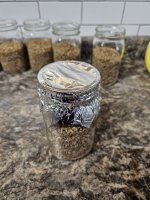
After you place your X, secure the jar Ring around the foil and take your second piece of foil and cover the ring, tape and foil underneath. This will give you an extra barrier keeping the foil underneath sterile after the pressure cooking process. You won't remove that foil until you're ready to inject with spores.

Repeat the steps for any remaining jars. Seal with the foil, add tape, secure with a ring and then cover with protection foil.

Awesome! You're ready for the next step!!! The sterilization process!
 

Attachments

  • photo172268.jpg
    photo172268.jpg
    2.4 MB · Views: 2
  • photo172269.jpg
    photo172269.jpg
    2.8 MB · Views: 2
  • photo172270.jpg
    photo172270.jpg
    3 MB · Views: 2
  • photo172272.jpg
    photo172272.jpg
    4.3 MB · Views: 2
  • photo172271.jpg
    photo172271.jpg
    4 MB · Views: 3
  • photo172273.jpg
    photo172273.jpg
    3.6 MB · Views: 2
  • photo172274.jpg
    photo172274.jpg
    2.9 MB · Views: 3
  • photo172275.jpg
    photo172275.jpg
    3.8 MB · Views: 3
  • photo172276.jpg
    photo172276.jpg
    3.1 MB · Views: 2
Next step
STERILIZATION

Now that your jars are all sealed up, next step is to sterilize it in your pressure cooker or autoclave.

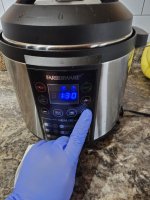
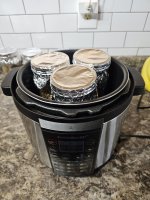
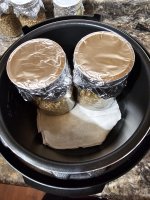
I don't have anything fancy. I have a Faberware pressure cooker. I think it's the 6qt version. I can only fit 3x 32oz jars in there so I normally put the other 3 prepped jars into my fridge.

I put a cloth on the bottom of the pressure cooker and even with that thin cloth I can JUST BARELY close it. The jars have to be in the right portion so the vent on the lid fits right in between the 2 jars. But you know what. It WORKS I've been doing this for 3 years and I have a 100% success rate so far. I lost my first jar but that was a dummy mistake. I only pressure cooked it for 30 min not 1 hour and 30 min AND STILL 2 of the jars were perfectly fine. Even with a big mistake like that.

Anyways.... Set the pressure cooker to 15psi or 1 atmosphere of pressure (usually default setting) for 1:30. That's 1 hour and 30 minutes (or 90 minutes of yours only displays in minutes)

Make sure the "keep warm" feature of OFF but don't release the pressure after it's done. Let it cool off and release the pressure on it's own. It'll probably release after 2 hours or less with the keep warm feature off. That thing will dry out the grain too much on the bottom.
 

Attachments

  • photo172277.jpg
    photo172277.jpg
    1.9 MB · Views: 2
  • photo172278.jpg
    photo172278.jpg
    2.7 MB · Views: 2
  • photo172279.jpg
    photo172279.jpg
    3.9 MB · Views: 2
  • photo172280.jpg
    photo172280.jpg
    2.4 MB · Views: 2
  • photo172281.jpg
    photo172281.jpg
    3.4 MB · Views: 2
  • photo172282.jpg
    photo172282.jpg
    3.5 MB · Views: 2
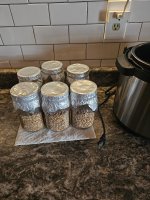
From this point going forward. ANYTIME YOU NEED TO TOUCH THE JARS, OR MOVE THE JARS, OR EVEN LOOK AT THE JARS...... YOU NEED TO BE WEARING GLOVES AND SPRAYING YOUR HANDS AND JARS WITH ISOPROPYL ALCOHOL!!! Put the jars in a cool dark CLEAN place in your house so the grains can cool down. You can't inoculate them if they are too hot. They should be below 83°F if you have those laser temp guns. 75-80°F is the best ideal temp for inoculation.

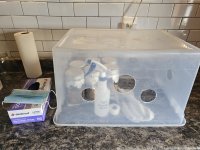
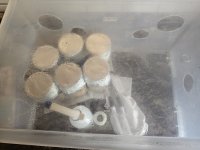
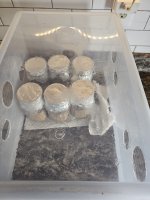
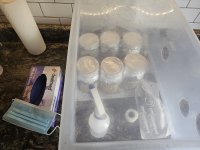
I use a 56 gallon tub as my tub tek container but also doubles as my Still Air Box (SAB). I tape the holes, which I'll explain later, and I bleach, Rinse, clean with isopropyl alcohol and then hit it with disinfectant spray because cleanliness.

I then put all the tools I'll need under the box and spray everything down with isopropyl alcohol. I make sure I showered and I'm wearing clean clothes. I'm in a room with closed windows and little air movement. I also have a HEPA air filter that I run for 30 min before I get started but that's just overkill.

You'll need:
Your grain spawn jars
Spore/live culture syringe
Gloves
Isopropyl alcohol spray and pads
Micropore tape


First spray with alcohol everything... YES AGAIN!
Slide the box to the edge of the table and stick you clean sterilized and gloves hands under the rim.
Spray with alcohol syringe and connect with plunger. DON'T UNCAP!
Carefully Take off the top foil on the jars and put an alcohol pad on the center of the X while tossing the top foil out through the hole you have your arms stuck under. Just let it fall to the floor, don't take your arms out!

Spray everything including your hands with alcohol!

Uncap the syringe and then with your other hand wipe the X with the swab and lift it. Stick the syringe in and inject the desired amount of liquid. Most syringes come with 10ml of liquid so I put 3ml per jar.

If possible, squirt in a circular motion to increase spore dispersal. Pull out the syringe and cover again with alcohol pad. Quickly move on to the next jar and do the same. Wipe, lift, stab, inject, lift, cover and move on. If you have been spraying with alcohol and keeping things clean, you should be fine. DON'T TRY TO FIRE STERILIZE THE NEEDLE. ALL THE ALCOHOL WILL MAKE YOU GO BOOM 💥 💥

You just have to be clean, quick and efficient.

After you inject your last jar, SPRAY everything with alcohol. Then take your micropore tape, rip a square, remove the alcohol pad and cover the injection site with the micropore tape. Once you have them covered up. You're DONE!! That's the hardest and most stressful part and you're all done.

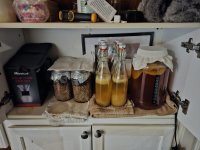
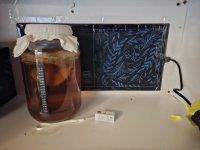
With clean, gloved hands, put the jars into a dark and warm spot in your house. I put a seed starter mat against the back of a cabinet and it stays 80°F inside that cabinet at all times it's the perfect incubation chamber. I keep my kombucha in there brewing at all times.
 

Attachments

  • photo172283.jpg
    photo172283.jpg
    2.9 MB · Views: 2
  • photo172284.jpg
    photo172284.jpg
    2.8 MB · Views: 2
  • photo172285.jpg
    photo172285.jpg
    3.3 MB · Views: 2
  • photo172286.jpg
    photo172286.jpg
    3 MB · Views: 3
  • photo172287.jpg
    photo172287.jpg
    3.1 MB · Views: 3
  • photo172290.jpg
    photo172290.jpg
    2 MB · Views: 3
  • photo172291.jpg
    photo172291.jpg
    2.5 MB · Views: 2
The picture above actually has them mat underneath and I have a bunch of towels stacked up on top of the mat which did not work well. You'll see later on at the bottom of the jars the grains have become totally dried out. I do not recommend putting them at on the bottom. If you want a good incubation chamber just tape it to the back of the cabinet and keep it on low. The amount of heat that it produces will keep that cabinet between 78 and 82°. The perfect incubation temps.
 

Attachments

  • photo172292.jpg
    photo172292.jpg
    1.3 MB · Views: 2
Next step

PATIENCE

Now we wait.... And wait and wait.
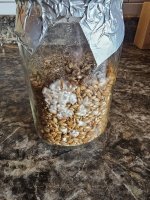
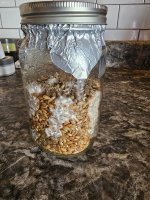
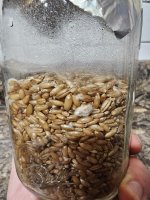
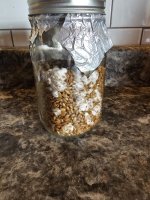
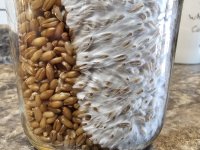
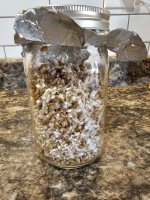
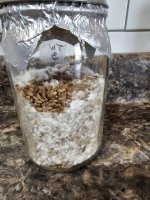
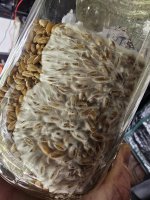
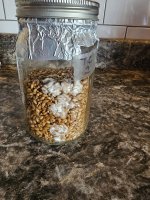
In the first 5 to 8 days, you should see at least one or 2 spots that have some white fluff growing. It might look like a little cotton ball it might look just like a few little hairs of silk. That's usually a good sign. As long as there's no other color growing then your good.

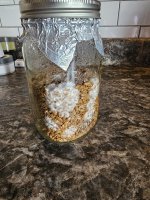
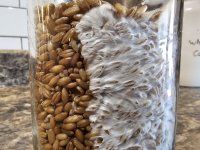
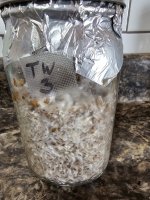
In about 2 weeks, you'll notice a wave of mycelium spreading out from those little initial balls of fluff. It'll look like a wave of hairs all perfectly combed over. If you see this wavey structure then you, my dear friend, have healthy, happy mycelium.

You can just leave it alone or at this point when it's 1/3 colonized, you can shake up the jar to break up the mycelium. This normally helps speed up the colonization process of the grain. It's not necessary but I do it each time. It can also help expose a hidden contamination.
 

Attachments

  • photo172293.jpg
    photo172293.jpg
    3.1 MB · Views: 3
  • photo172294.jpg
    photo172294.jpg
    3 MB · Views: 2
  • photo172295.jpg
    photo172295.jpg
    2.6 MB · Views: 2
  • photo172296.jpg
    photo172296.jpg
    3.1 MB · Views: 2
  • photo172297.jpg
    photo172297.jpg
    2.4 MB · Views: 3
  • photo172298.jpg
    photo172298.jpg
    2.4 MB · Views: 3
  • photo172299.jpg
    photo172299.jpg
    3.1 MB · Views: 2
  • photo172300.jpg
    photo172300.jpg
    3 MB · Views: 2
  • photo172301.jpg
    photo172301.jpg
    2.6 MB · Views: 2
  • photo172302.jpg
    photo172302.jpg
    2.6 MB · Views: 2
  • photo172303.jpg
    photo172303.jpg
    2.6 MB · Views: 2
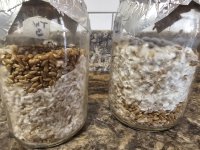
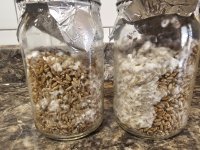
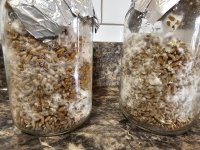
Some jars after a shake. They will all form back into one mass again.
 

Attachments

  • photo172304.jpg
    photo172304.jpg
    3.1 MB · Views: 2
  • photo172305.jpg
    photo172305.jpg
    2.9 MB · Views: 2
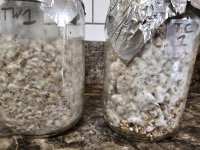
After shaking the jars, I noticed that I've of them was not colonizing again (I would later find out the aluminum foil had turn under the metal ring and was allowing contaminants to get in)

You can see the other jars are all full of white fluff while the other jar is all wet and oozey looking with yellow white fluff growing. When it comes to mycelium. If it ain't white, it ain't right. So one of the jars just went into my outdoor compost and the jar itself was sterilized in the pressure cooker for 1:30.

The other jars all move on to the next step.
 

Attachments

  • photo172306.jpg
    photo172306.jpg
    3 MB · Views: 3
  • photo172307.jpg
    photo172307.jpg
    2.7 MB · Views: 2
  • photo172308.jpg
    photo172308.jpg
    2.8 MB · Views: 2
  • photo172309.jpg
    photo172309.jpg
    2.4 MB · Views: 3
  • photo172310.jpg
    photo172310.jpg
    2.9 MB · Views: 2
  • photo172311.jpg
    photo172311.jpg
    3 MB · Views: 2
At this point of you're just looking for CO2 production like an exhale bags, you just need to do one last thing.

Spray the lid and pointy item with alcohol. Poke a few holes in the foil and cover with micropore tape. You can then hang the jars HORIZONTALLY above your plants because CO2 is heavier than air and will fall down. The jar will be good for about 4 weeks or more. It will continuously keep pumping out CO2 until all the grains are broken down. Just like with the exhale bags though, you'll need more than one jar to have any real effect

To double the CO2 output, you need to fruit the mushroom. That's when they become oxygen hungry and dump loads of CO2 in very short amounts of time.
 
Back
Top