Now that I have these built, I can measure how many gallons of soil they hold. These will be true gallon measurements. I know some of the plastic containers say 2 gallon container but only hold like 1.25 gallons of soil. I wanted to make my own smart pots so I can configure my grow space for my needs and wants. This will come in handy later on for future experiments. I need to buy a few more tents and lights first. One of my first experiments when I get another tent is to build a horseshoe grow rack. 4 ft long 3 ft wide 4 ft long. This will bring the horseshoe grow rack near the center. It's also going to be 3 ft tall or so. I want the Roots to be able to reach a depth of 2 feet plus have a water through underneath for bottom watering. It will actually be more of an H shape. 4 plants per side and 3 in the center. The idea comes from the square foot garden concept. They recommend 15-18 inches of depth for the root systems. Trying to see if there are any advantages or disadvantages to a 24+ inch Root depth. Bigger roots mean bigger plants. I have lots of ideas to try with gardening. This is more for tomatoes than anything else.
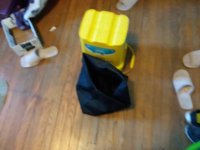
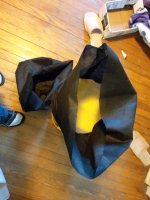
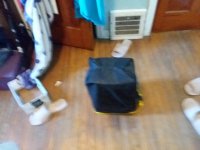
Now that I finished rambling, I just made the smart pots out of landscape fabric, AKA weed barrier. I originally got the idea this summer. I made a rectangle planter box out of 2x4s. I didn't have anything for a bottom, so I just stapled on some landscape fabric. Filled with potting mix, not soil. Added seeds, left outside. Well, one half was elevated so air could flower underneath and the other half was on the ground with no airflow. The plants that had airflow underneath grew faster and thicker than the other plants. 4 months later, I finally got around to building the fabric planters. Will post results of use. The round one is the same diameter as a 5 gallon bucket, just not as tall. The square one is based off the Tidy Cats 35 pound cat litter yellow container. About 3 inches shorter. I think it's actually less than 3 inches. Once I fill it with soil, I will be able to get a better measurement.
Happy growing.
Madman
Now that I finished rambling, I just made the smart pots out of landscape fabric, AKA weed barrier. I originally got the idea this summer. I made a rectangle planter box out of 2x4s. I didn't have anything for a bottom, so I just stapled on some landscape fabric. Filled with potting mix, not soil. Added seeds, left outside. Well, one half was elevated so air could flower underneath and the other half was on the ground with no airflow. The plants that had airflow underneath grew faster and thicker than the other plants. 4 months later, I finally got around to building the fabric planters. Will post results of use. The round one is the same diameter as a 5 gallon bucket, just not as tall. The square one is based off the Tidy Cats 35 pound cat litter yellow container. About 3 inches shorter. I think it's actually less than 3 inches. Once I fill it with soil, I will be able to get a better measurement.
Happy growing.
Madman