What's new
GrowWeedEasy.com
You're browsing as a guest. Sign up to join the conversation, share your grows, and get help from thousands of fellow growers — it's free and takes less than a minute.

First Time 100% Perlite Hydro Grow.

BaccaRacca

New member
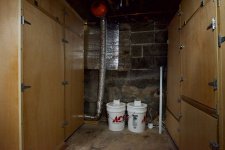
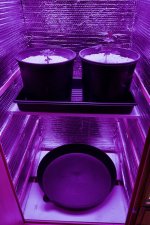
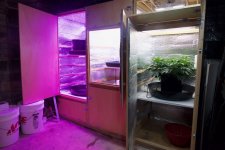
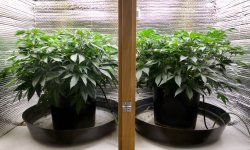
I have started to travel a little bit, which caused me to investigate automatic drip irrigation. I use fairly inexpensive Moistenland irrigation pump/programmable timers that you can see sitting on 5-gallon pails in the grow room. Initially I bought a couple for $30, but the price has risen on the latest model. Right now I'm running three pumps & pails (there is a third pump & pail in the seedling cabinet [middle], which feeds the plants in the cabinets on each side. I do not irrigate seedlings.

I have totally done away with peat moss as a buffer, now that the pumps give me the ability to irrigate 4-6 & more times a day. Ph Down, Cal-Mag Plus and my regular mixture of nutes.

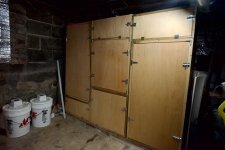
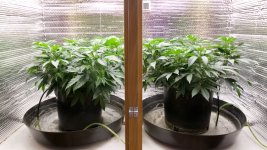
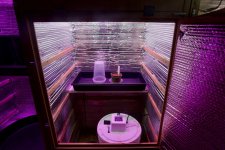
I have posted exterior photos of the cabinets. The tall double-cabinet is 2'x4' and is used primarily for flowering. I use a pair of Vipar-Spectra XS-1500 lights. They are ideal for my micro grow, replacing my old VS-450s. I'm getting tighter buds from them.

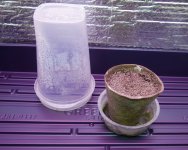
Anyway, here is the basic set up:
 

Attachments

  • photo166465.jpg
    photo166465.jpg
    205.9 KB · Views: 2
  • photo166466.jpg
    photo166466.jpg
    220.7 KB · Views: 1
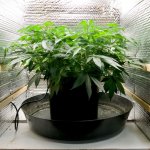
Well, that's the basic set up above. Inside I use 2.5-gallon pots with pure coarse perlite, then a build "irrigation harnesses" with 4 drip irrigation emitters for each pot. Every pot has a pump.

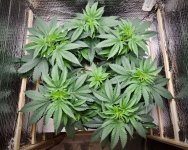
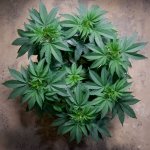
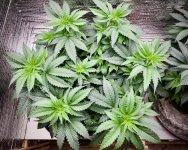
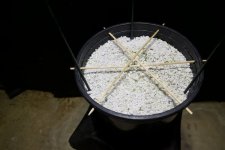
I grow the seedlings or clones until I have seven good laterals. Then I spread and tie the laterals to bamboo shish--ke-bob skewers that I push through drilled holes in the pots. Usually this happens around 6-8 weeks.

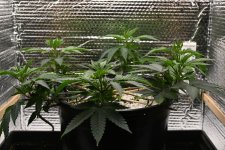
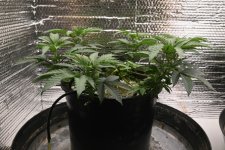
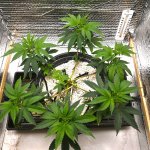
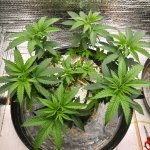
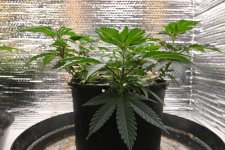
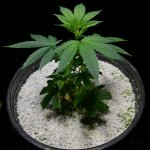
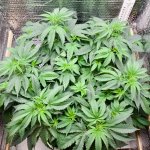
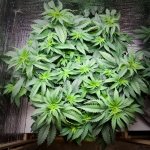
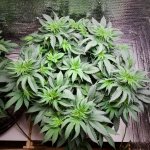
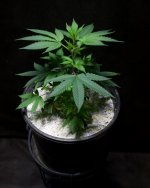
I've included better views of the interior of the cabinets plus the three White Widow plants I'm growing.

Photos are from last week, August 25th.
 

Attachments

  • photo166467.jpg
    photo166467.jpg
    297.4 KB · Views: 2
  • photo166468.jpg
    photo166468.jpg
    276.7 KB · Views: 2
  • photo166469.jpg
    photo166469.jpg
    629 KB · Views: 1
  • photo166471.jpg
    photo166471.jpg
    549.3 KB · Views: 1
  • photo166470.jpg
    photo166470.jpg
    257.8 KB · Views: 1
  • photo166472.jpg
    photo166472.jpg
    461.8 KB · Views: 1
Last edited:
Well now, I'm pretty much caught up with this post. It has been a busy week.

The cuttings I took before I spread the White Widow plants went to the cloner and developed roots very quickly. I planted two. These are two females from non-feminized plants that I'm planning on dousing with collodial silver and make some male flowers for breeding feminized White Widow seeds. As you can see I grow these under some old, cheap blurple lights. With the way LED lights have improved I may need an upgrade. But for producing seeds, this has worked well.

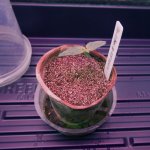
I also dropped a Dos-Si-Dos seed and that looks like it is growing nicely.

All three of the White Widow plants that I spread and trimmed last week are doing well. The nute mixture seems fine.
 

Attachments

  • photo166474.jpg
    photo166474.jpg
    261.9 KB · Views: 2
  • photo166475.jpg
    photo166475.jpg
    335.9 KB · Views: 2
  • photo166476.jpg
    photo166476.jpg
    453.5 KB · Views: 1
  • photo166478.jpg
    photo166478.jpg
    323 KB · Views: 1
  • photo166477.jpg
    photo166477.jpg
    272.6 KB · Views: 2
  • photo166479.jpg
    photo166479.jpg
    377 KB · Views: 1
  • photo166480.jpg
    photo166480.jpg
    213.1 KB · Views: 2
  • photo166482.jpg
    photo166482.jpg
    469.6 KB · Views: 1
  • photo166481.jpg
    photo166481.jpg
    302.9 KB · Views: 1
That's a cool looking setup.
How does the air changeover and air movement in the grow space work?
My setup here is automated but I only have 1 tank of 60 gallons so growing different strains becomes a compromise..
 
Thank you Bluey.

For the three boxes, Breed, Seedling and Veg air movement is simply convection. I have 4" holes at the bottom of the cabinets all aligned with each other to allow cool air to enter and holes above the lights to allow hot air to exit. On the 2'x4' flower chamber, where I'm running two Vipar-Spectra XS 1500s, I'm venting with a 4" blower. With the solid walls of the cabinet I don't need a 6" blower. I'm growing in an old coal bin in a basement and it is naturally cool so I can keep the space locked and enclosed without further ventilation. There are two approximate 4" holes between a couple of joists that span the room that provide ventilation into the basement as a whole. I do have another 4" blower I could use to vent the room if it got too hot and humid, yet to date there has been no need to run it.
 
Just doing a bit of housekeeping. Thought these photos might be useful and show what I have going on.

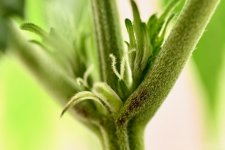
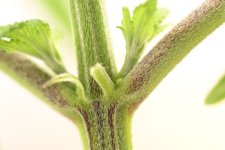
The seeds were standard White Widow Extreme that I bred from standard. White Widow Extreme that I purchased from Amsterdam Marijuana Seeds. E-Z P-Z. The plants were courteous enough to expose gender at about 6 weeks. I planted six seeds and from that I got 3 confirmed females, 1 hermey and 2 boys.. I've attached photos of both girl feathers and boy balls. Shot with Nikon Z-30 with Tokina 100m F2 Macro lens on a tripod.

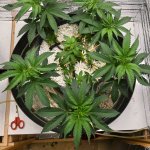
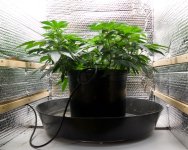
The plants are spread and tied down on pots that have been drilled to accept , 3- 12" bamboo shish-ke-bob skewers, upon which I tie my lateral branches. Usually I will lash 6 down and set up a 7th in the middle of the plant.

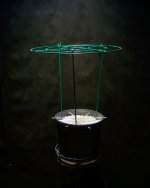
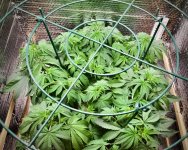
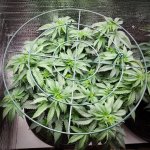
Instead of using a net or mesh screen to support the plants as they mature and buds get heavy, I use a 20" round flower support, which is supported by legs attached to the middle ring. I have included a plant-free pot to show how the support system works. I use the flower supports to make the pots portable, so I can move the plants between veg, flower, and seed-breeding stations.

As fast as the plants are growing, I should install the round supports this week.
 

Attachments

  • photo166516.jpg
    photo166516.jpg
    132.7 KB · Views: 1
  • photo166517.jpg
    photo166517.jpg
    120.4 KB · Views: 2
  • photo166518.jpg
    photo166518.jpg
    132.6 KB · Views: 1
  • photo166519.jpg
    photo166519.jpg
    150.4 KB · Views: 2
Thank you for the very helpful tips. I'm going to use the idea of drilling holes into the top of my 15gal outdoor pots and place small diameter dowels similar to yours. I'm 66yrs old and this site just brings out some very good tips. I'm useing strong clamps which work well but i dig the idea of longer length sticks protruding out further to spread the branches wider. Man that's just a lovely setup you've done, big kudos :)
 
It's been five days since I took progress photos on the continuous grow (three days since I posted the photos). The plants are continuing to grow and fill out better than expected with this new system.

Wate/Nutersconsumption using the 2.5-gallon pots with the Moistenland drip irrigation system is between 1.0 and .7 gallons a day depending on the plant. Very similar to the water consumption I had using my 12-gallon pots, only I water more frequently and use less water/nutes per cycle. Right now on the thirstiest plant, I'm 1 pint every three hours, or 8 times a day. Indeed all plants, except the seedling and the "White Widow Feminized Pollen King," which are hand watered at the moment get 8 feedings a day with only the amount of water varying.

I'm really amazed that by taking advantage of the Moistenland's ability to perform short, frequent watering/nute applications, that I'm -- so far -- able to grow a plant as large as what I've been growing with a much larger pot.

Photos are showing five days growth since last post.
 

Attachments

  • photo166530.jpg
    photo166530.jpg
    250.7 KB · Views: 2
  • photo166531.jpg
    photo166531.jpg
    224.8 KB · Views: 1
  • photo166534.jpg
    photo166534.jpg
    415.3 KB · Views: 1
  • photo166533.jpg
    photo166533.jpg
    222.9 KB · Views: 1
  • photo166535.jpg
    photo166535.jpg
    538.8 KB · Views: 2
  • photo166536.jpg
    photo166536.jpg
    298 KB · Views: 1
  • photo166538.jpg
    photo166538.jpg
    512.2 KB · Views: 1
  • photo166537.jpg
    photo166537.jpg
    543.1 KB · Views: 2
That looks like a pretty good grow with plants thriving.
.
Do you get much runoff and is that going to waste or being recycled?

During lights out do you decrease the amount you fertigate or get more runoff or no change do you know?
 
Bluey, Thank you, and good questions.

Initially I run the system until I get a bit of runoff, which goes into the compost pile. Between all three plants I have not had more than a gallon of runoff, and that was early.

I dial back from there until I get a mild damp spot that dries off quickly. I also get a feel for how heavy each pot is, and fortunately with 2.5-gallon pots they aren't too heavy even when all loaded up.

This article on GWE is very good: https://www.growweedeasy.com/how-to-set-up-an-automatic-watering-system-for-cannabis-plants

My biggest fault with the Moistenland system is that it comes with clear tubing, which grows algae under bright lights. You'll see I've been moving to food-grade black silicon tubing to avoid the issue.

The Moistenland system does not allow me to dial back. I have seen no overflow from evening watering. If there is any it is absorbed by the plant and the surrounding environment very quickly.

The big advantage I'm hoping for with this experiment is to grow plants that fill their 2x2spaces without too much crowding and deliver yields in a smaller pot than what I had been using. I save on materials, the posts are very easy to move around (and photograph), and very easy to flush.
 
Thanks for following, MagicMike66. So far, so good with this experiment. I keep running to the grow room hoping the thing doesn't crash some how. ;)
 
Last edited:
Thanks Bacca.

Will be interested to see how this goes for you through the stretch into flower.

Not much water/nute storage/buffer in perlite so will be keen to learn if this makes it harder to manage or not.
 
Quick update.

I did some understory trimming and pruning of do-nothing stems, also pruned back anything outside my 20" circle. At left my seed queen and to the right my two flower girls.

DSC_1251.jpg
DSC_1252.jpg


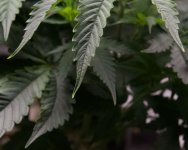
I did notice some slightly burned leaf tips on my Seed Queen, checked EC and PH: 1400/8.0 Yikes! Brain fog strikes again (not cannabis; Xtandi induced). Threw 2-gallons of ph-adjusted-to-5.8 tap water through it and tossed the drain water (EC around 480, with a tap water base of 200) out on the compost pile. Now running EC 680, Ph. 5.8. through it using my base nute, with no nitrogen boost. We'll see what happens.

DSC_1255.jpg


On my future flower babes, things are looking like my nitrogen is a bit hot and twisting the leaves. Plant on the right is very dark with twisted leaves. So I dialed back a bit. I used to run EC as hot as 1100 with a 20%-30% peat buffer and often did pretty good, but now I'm armed with auto watering and the addition of a decent Ph. meter and left naked with no buffer, I'm going to be sensitive to any abnormalities. Now running between 700-800 EC.

DSC_1253.jpg
DSC_1254.jpg
 

Attachments

  • DSC_1255.jpg
    DSC_1255.jpg
    132.1 KB · Views: 1
Yes i would say you over did the high N feed. How come you like MG for feeding MJ ? Just asking because i used to use it before i found a couple other brands that did'nt show the burn & twist that MG does. I guess you could go much lighter per gram of that stuff. I still use it in my outdoor sprayer for my flowers an roses. But there's better when it comes to weed.
 
SoOrbudgal, that is a good question. Initially (50 years ago) I used the standard MG yellow/green box (24-8-26 very hot nitro) because I grew deep underground and that is all there was, I felt, to avoid detection. I used a heavily doctored mix and got away with it.

About 8 years ago I switched to MG Vegetables & Herbs, with a label showing 18-18-21, with some of the nitro derived from organic soy hydrolysates. And that attracted me. I could use partially organic derived nutes in my hydro system without mucking stuff up. It has worked very well for me as a base nute. If I need more nitro, which I didn't here, then I add a touch of MG Green & Yellow box.

My mistake here is I used a bit of yellow and green and didn't need it. And I should have known better. I've grown White Widow before without the additive. My last harvest of GG gave me 10 oz of bud in my 2'x2' space under 150-watt Vipar Spectra VS 1500s, without it, too. We called the girl, "Godzilla." As a micro grower, that's the max I want to harvest, and the pantry better be bare. I work to stay Michigan legal.

Oh, and I'm a cheap-butt. I can buy 2#s of this stuff for ten bucks, Base nute mix has been 1 tsp./gal. But now that I've gone totally naked with no buffer, I'll be using a bit less.

Thanks for asking, and thank you for your support of my little experiment.
 
Last edited:
It was Flush and Flip weekend at Casa Bacca Racca.

First part was the flushing.

I had run som too-hot nutes through the system so I knew my runoff would measure high, plus I'm using nearly as much solution on these 2.5-gallon pots as I was my larger 12 gallon ones. I think I measured as over 3,000, on one pot; lowest number as around 1900. So flush we go!

First thing I do is drain my nute pots and rinse them out well. Thenrinse with Ph-adjusted tap water running through the system. My tap water is running around 7.6 right now, and EC meter says I'm running 170 ppm of solids out of the tap. I add 3/4 tsp. of Ph Down to a gallon of water to get things down to around 6.0.

Then I simply detach my growing pot from the irrigation system, replace its standard saucer with a clean saucer with pour spout, I run a gallon at a time on the manual setting so the pump runs constantly. It takes a few minutes.

DSC_1304.jpg
DSC_1303.jpg


Time for a bowl.

Then I come back and measure my vitals. Drain and repeat until vitals look good. It took about three gallons a pot to get the numbers (and me) calmed down. Notice how the shelving system helps make the draining easy for this old man. I just pull the saucer out and tip it a bit. Works well.

Oh and speaking of easy, in order to keep things well trimmed inside my cramped 2x2 and 2x4 spaces, I use these lazy susan ball-bearing sets under each saucer. They rotate really easily. My concern is that I don't want to block air circulation along the inside walls of the boxes. Too, I don't have a way of supporting heavy buds at the edge.

DSC_1301.jpg


Get Ready to Flip!

After the flush, I added my circular perennial support, in place of a true screen. Again this is done for portability reasons. Each pot is its own little world.

DSC_1284.jpg
DSC_1285.jpg
DSC_1286.jpg


You'll note that there is still some drain water in the trays in the first photo. That is from dialing in the drip system to the right rate. I ended up replacing the algae-clogged clear tubing, which came with the system, with a black, food-grade hose. The black should keep the algae down as it does not transmit light. Turned out it gave me a bit better flow, so I had to turn things down a bit.

Pretty much the same story with "The Seed Queen," which I've left to flip in what is traditionally just a veg box. However right now the best use of space is to flip this girl to 12/12 so I can have flowers soon for breeding seeds. She will eventually go to the "Seed and Breed" box where I'm preparing a couple of cloned for the collodial silver treatment so I can get "feminized" pollen.

The "Seed Queen" looks a bit weak at the moment. She endured the highest amount of over-nute, had some browned tips, and I had to flush her a couple of days ago pretty good. Also because I'm using her for seed, I don't need her that big. So I cut back the light to 25% for a couple of days. I was also having problems with the pump rate with the drip irrigation system on this plant, so running less light until I could get more nute solution wasn't a bad thing to do.

She'll perk up, I assure you. She already has as I write this.

DSC_1283.jpg
DSC_1282.jpg


Also going on in the "Seed and Breed" cabinet is this foot-tall female I'm spraying with collodial silver in order to get pollen that will breed feminized seed. It doesn't need to be large; a lot of pollen goes a long way!

DSC_1279.jpg


All these were flipped on Saturday September 9. First time I've had 5 of my 2x2 spaces on 12/12. Very exciting times!

Oh, and finally. Next up is this Dos-Si-Sos that popped its cap on 8/25. Two weeks in, she is looking good. Near time to transplant.

DSC_1272.jpg


That's about it for flush and flip day!

BR


​

 

Attachments

  • DSC_1279.jpg
    DSC_1279.jpg
    171.3 KB · Views: 1
  • DSC_1283.jpg
    DSC_1283.jpg
    527.7 KB · Views: 1
  • DSC_1285.jpg
    DSC_1285.jpg
    518.5 KB · Views: 1
Back
Top