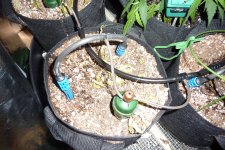
I ended up with 6 of the regular gravity fed Blumats one to each 2 gallon cloth pot, and one Junior (that sucks up from a gallon jug below) for a plant that I'm saving to be the 'mom' for my next crop. They worked well while I was away (though I worried about them none the less).
Each of the regular Blumats feeds two Drip Stakes that guide the solution down into the soil. Not sure if that was necessary, or even better than just letting it drip out on one spot, but it did keep my plants alive and healthy for many weeks.
It's important to adjust them carefully at the start, and to make only the recommended 'half arrow' adjustments at a time afterwards. Even one 'half arrow' tweak can make a noticeable difference in the rate the reservoir is emptied. The initial adjustment requires that the soil in which each Blumat is placed be thoroughly saturated. You open the valve (counter clockwise) to allow a full flow (this also purges any air out of the lines), Then slowly close it (clockwise) until a single drop remains suspended at the open tube end. Then close it 2 'arrows' (half a turn) The 'arrows' are V shaped marks on the valve, so you can gauge how much you are adjusting it. One 'arrow' (distance between the points of two V's) is a quarter turn.
How they work: The valve consists of the adjusting screw, and a small 'piston'. A 3mm flexible tube that delivers the water passes between them. The 'carrot' part is made of a porous ceramic material that's inserted into the soil. As moisture builds up in the surrounding soil, it is drawn into the carrot by capillary action (I think). This additional moister inside the carrot presses upward on the piston, pinching the delivery tube against the adjusting screw, and cutting off the flow of fluids through the tube. When the soil dries out, moisture flows back out by the same capillary action going in the opposite direction. This releases the upward pressure against the piston, thus allowing water to flow through the distribution tube once again.
Ingenious application of the principle of negative feedback. Depending upon the position of the adjusting screw, a certain equilibrium between the fluid contained in the Blumat, and the moisture in the surrounding soil is maintained. There's just the one moving part (the piston), and it's reliable with no electricity, and only minimal supervision.
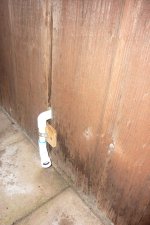
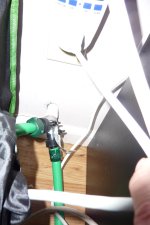
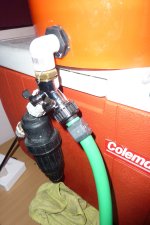
Though a kit comes with a 'bulkhead' fitting that goes directly to the 8mm distribution manifold tubing (also included in the kit), I set mine up with a 1/2" bulkhead fitting (also from Sustainable Village, the Blumat folks) and a male 1/2" MPT (maybe it's 3/4") to MHT (hose thread) adaptor. This to a hose thread Y connector with two ball valves in it, designed to allow two hoses to be fed off of one hose bib. One outlet goes through a regular irrigation fine strainer, and then out to the 8mm tubing that feeds the Blumats. I had previously installed a short piece of pipe with a male garden hose thread on the inside and female on the outside passing through the outside wall of my grow room, to provide drainage for plant runoff, and dehumidifier condensate. I added another Y with ball valves at the inside wall, connected by a short length of garden hose to the other outlet on the reservoir's Y. By attaching a nearby garden hose to the outside fitting, I can refill my 5 gallon reservoir without moving the bucket, or having to bring the outside garden hose inside. Once the drainage valve at the wall is closed, and the other one opened and the distribution valve on the Y by the reservoir closed, and city water pressure applied, I can open the other valve at the reservoir outlet, watch the bucket fill, and then close it before it overflows. No splashing or dripping in the room, and no lifting a full bucket up to the height necessary to gravity feed the Blumats. Nothing to connect or disconnect other than the garden hose outside.